
Depending on the complexity of Production Schedules, two or more competing Milestones with different LRM dates may drive a single task’s LRM start and finish dates. For example, the system commissioning date and area handover target date both may drive the LRM dates of an installation task.
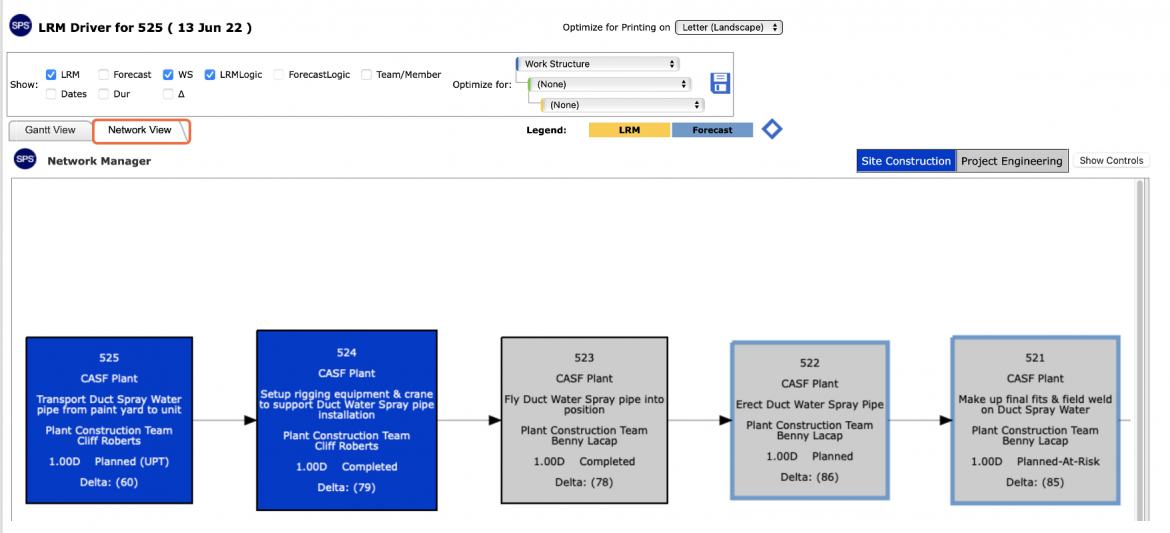
The LRM Driver enables users to clearly see which Milestone, and the tasks leading up to it, drive the LRM date. This information can be represented in Gantt chart format as well as a network through Network Manager. The LRM Driver enables answering the question “What are all the tasks that drive the current LRM date for a certain task?”
The LRM Driver is available in SPS|PM in the Lookahead view, Lookahead (Gantt Chart) view, and Gantt Charter view. To access the LRM Driver use one of the following methods:
Method 1: Lookahead View
To access the LRM Driver from the Lookahead view, complete the steps below:
- From the Main Navigation Bar select Lookahead, then select Task List.
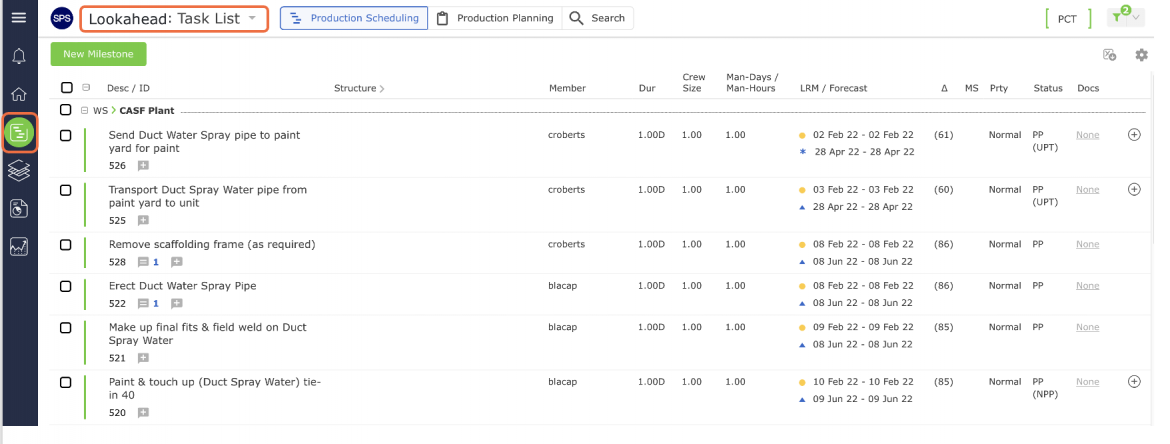
- From the Lookahead view, select the desired Milestone / Task by clicking once anywhere on the Milestone / Task row.
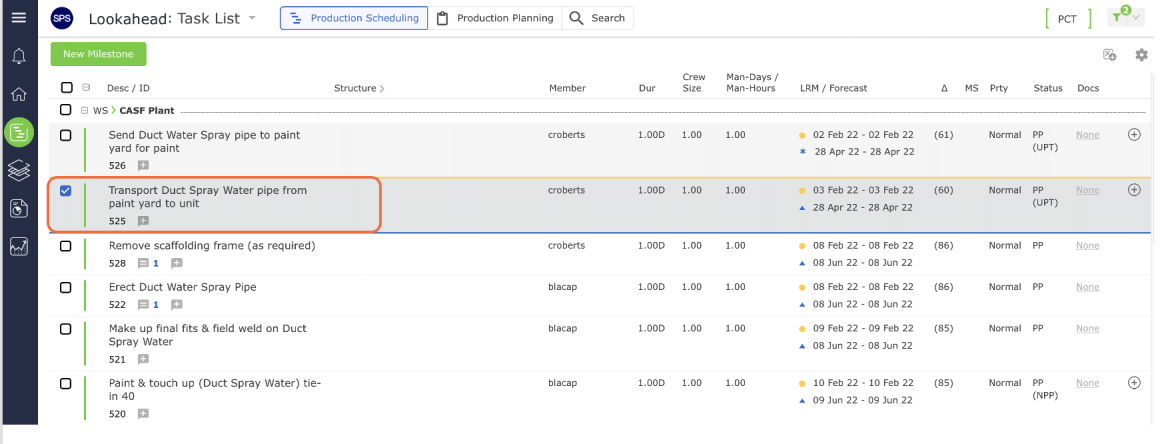
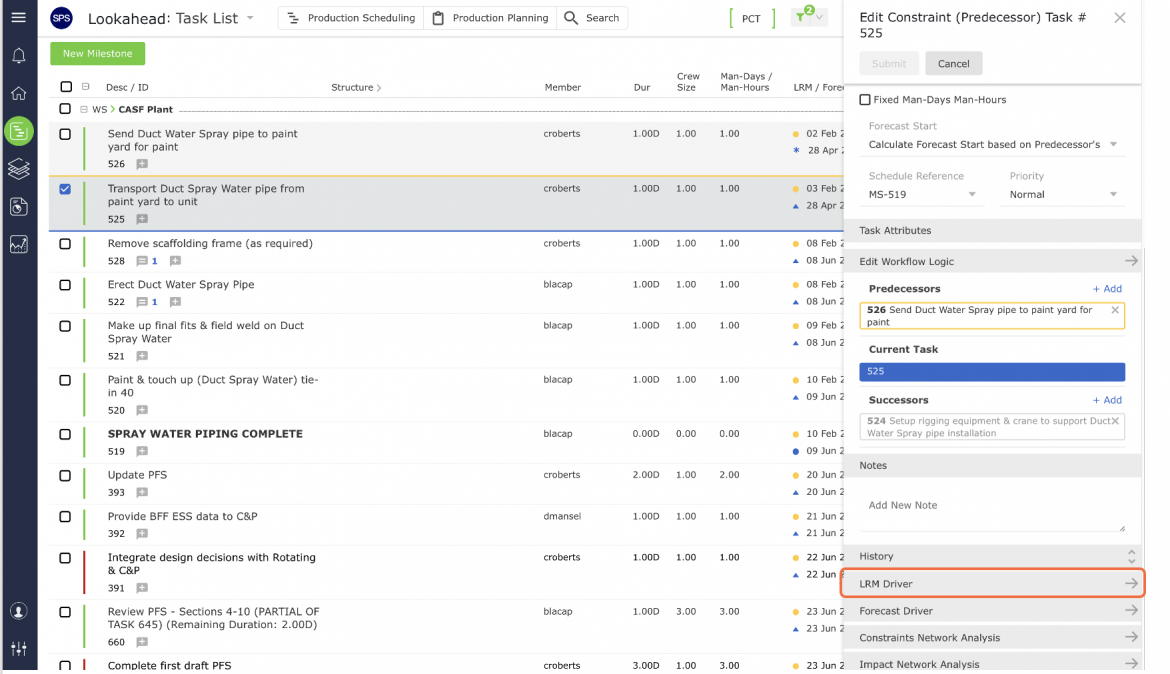
- Once selected, the task row will display a blue outline, then from the Edit Constraint (Predecessor) Task window select LRM Driver.
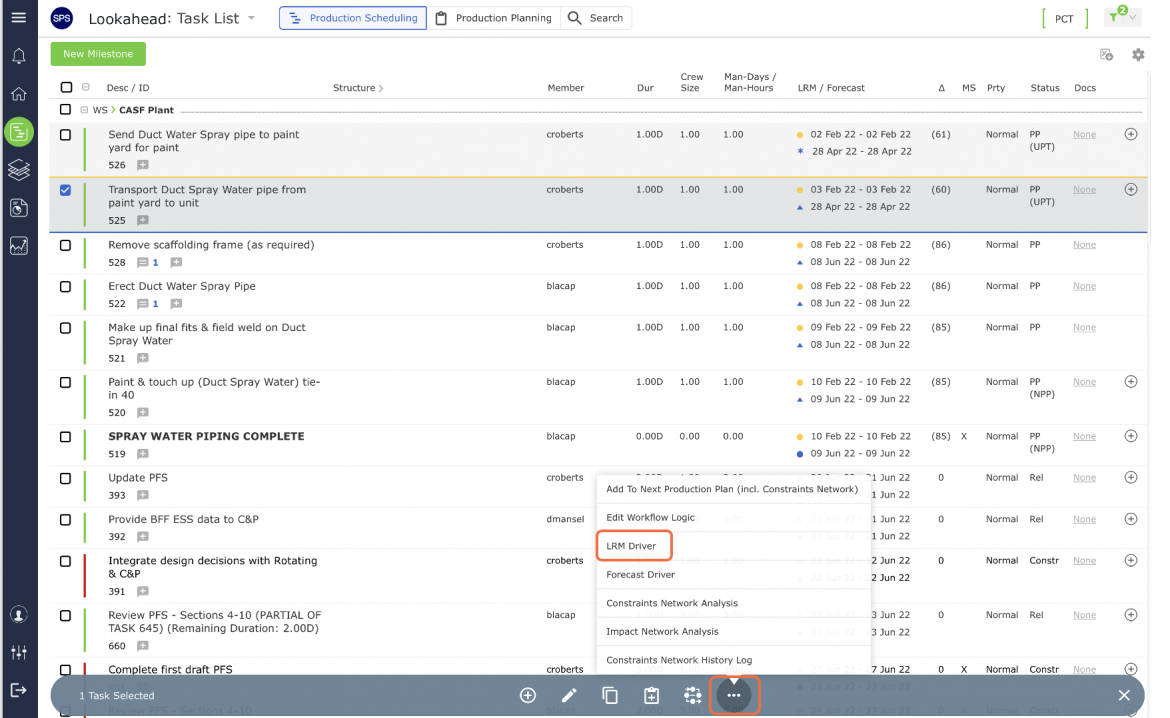
- Alternatively, from the Lookahead view, click the More Option on the bottom toolbar, then select LRM Driver.
- The LRM Driver opens in a new window and displays the Milestones / Tasks driving the LRM date of the selected Milestone / Task.
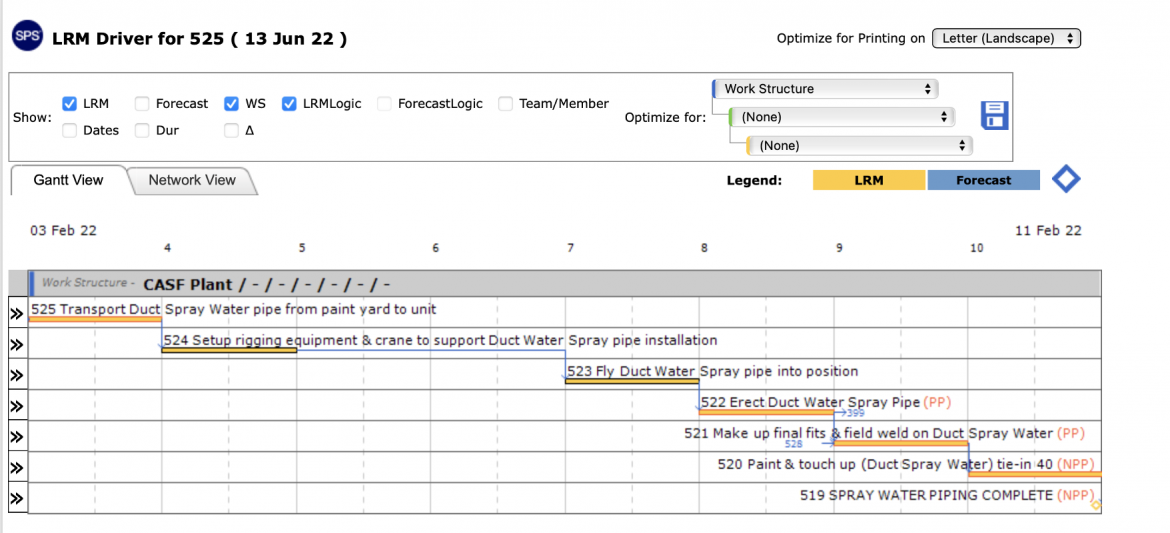
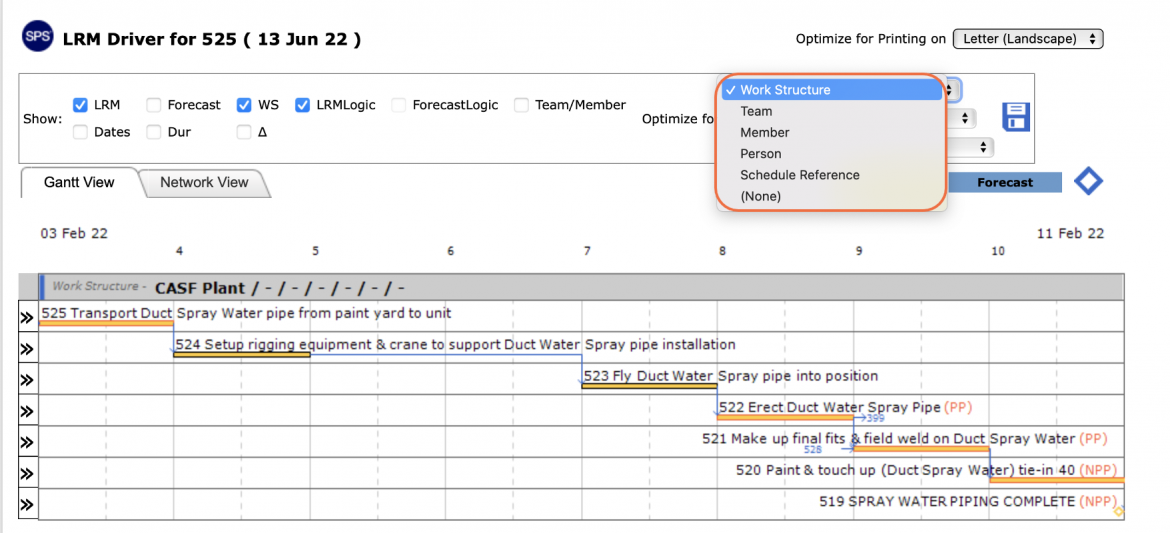
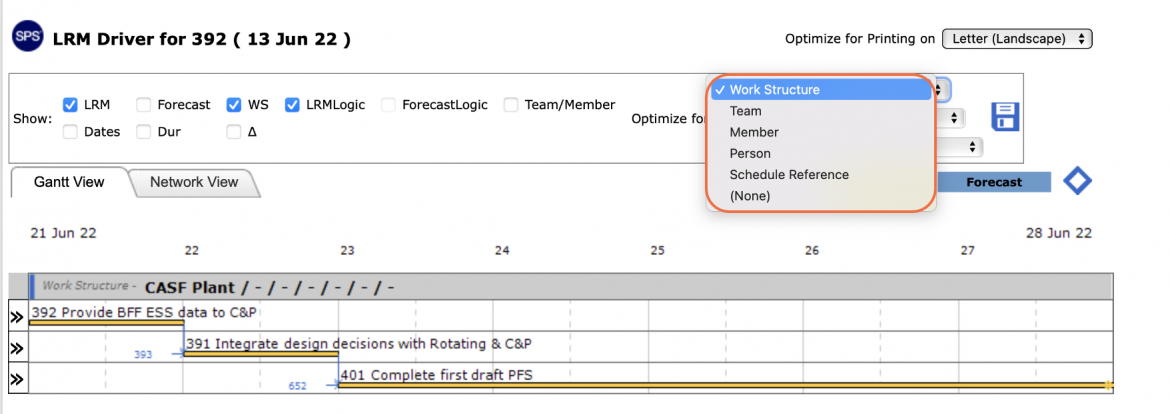
- The attributes shown on the LRM Driver can be limited by filtering by LRM, Forecast, Work Structure, LRM logic, forecast logic, team and team member, dates, and duration. Additionally, data can be visualized by the available Work Structure by selecting: Optimize For.
- The LRM Driver default display is the Gantt view, but can also be viewed in the Network Manager view by clicking the Network View tab.
Method 2: Lookahead (Gantt Chart) View
To access the LRM Driver from the Lookahead (Gantt Chart) view, complete the steps below:
- From the Main Navigation Bar select the Lookahead then select Gantt Chart.
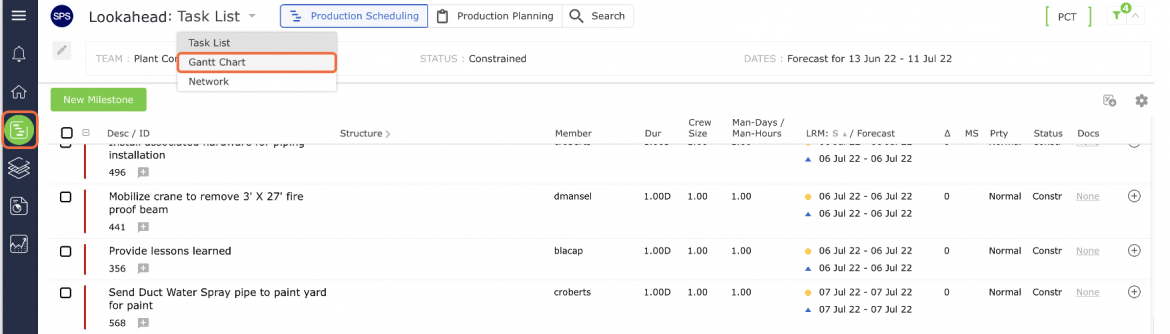
- Select the desired Milestone / Task by clicking once anywhere on the Milestone / Task row. Once selected, the task row will display a gray background.
- Click the More Options icon on the bottom toolbar, then select LRM Driver.
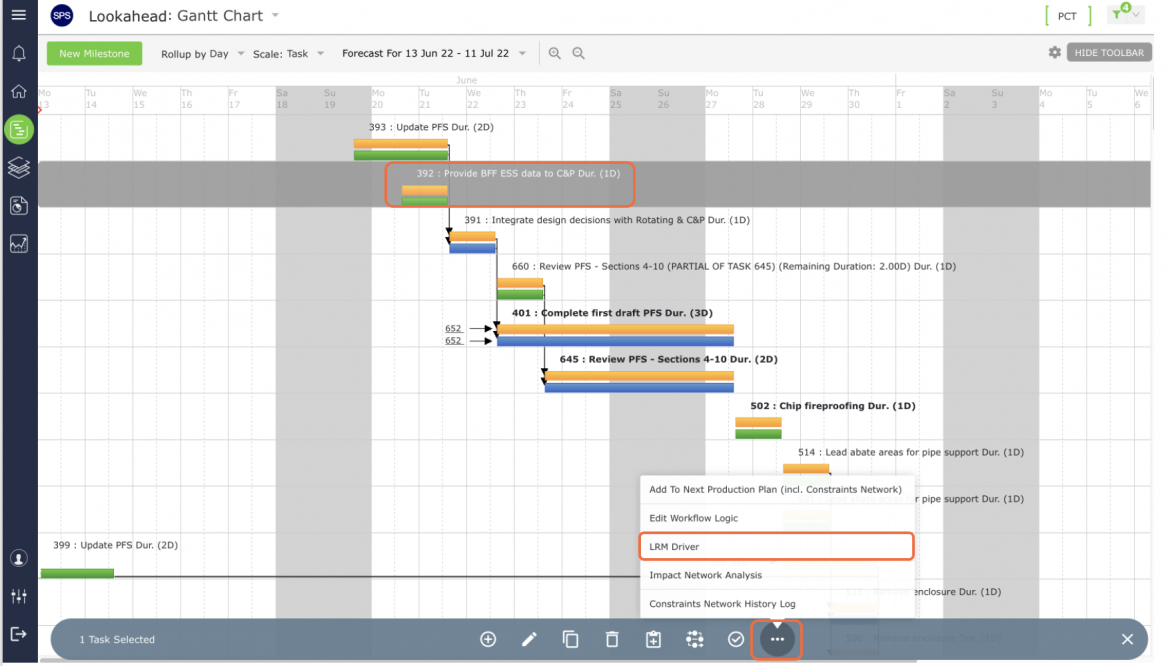
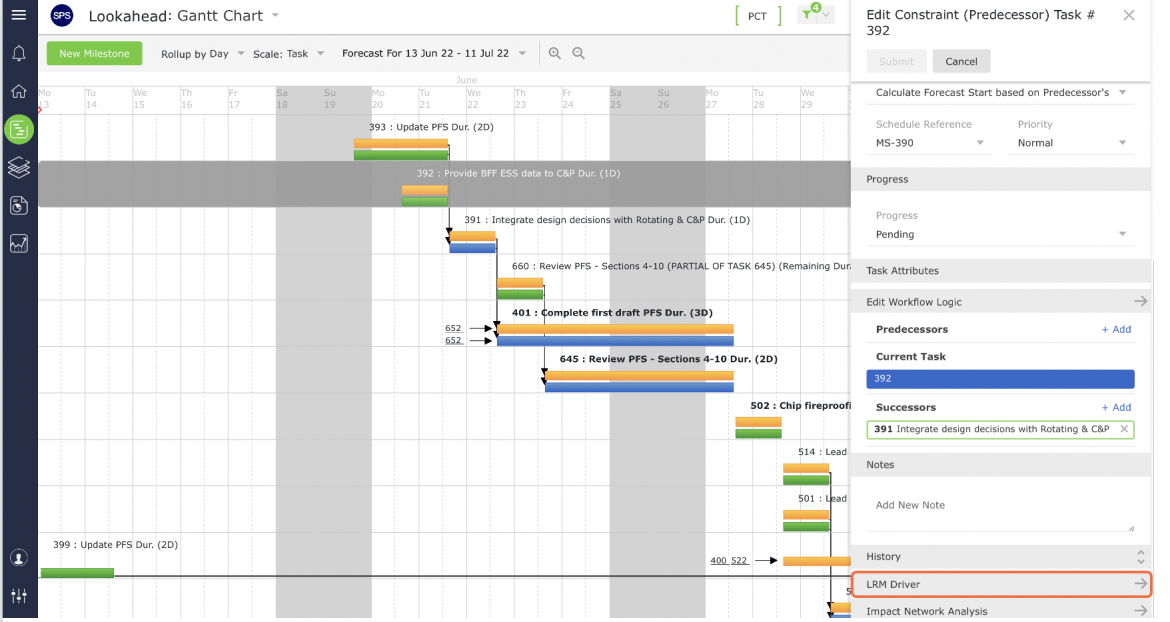
- The Lookahead (Gantt Chart) will display the LRM Driver through the Edit Constraint (Predecessor) Task window by clicking anywhere on the task.
- The attributes shown can be limited by filtering by LRM, Forecast, Work Structure, LRM logic, forecast logic, team and team member, duration, etc. Additionally, data can be visualized by the available Work Structure and other attributes by selecting: Sort By.
Method 3: Gantt Charter View
To access the LRM Driver from the Gantt Charter view, complete the steps below:
- From the Main Navigation Bar, select Reports, then select Gantt Charter.
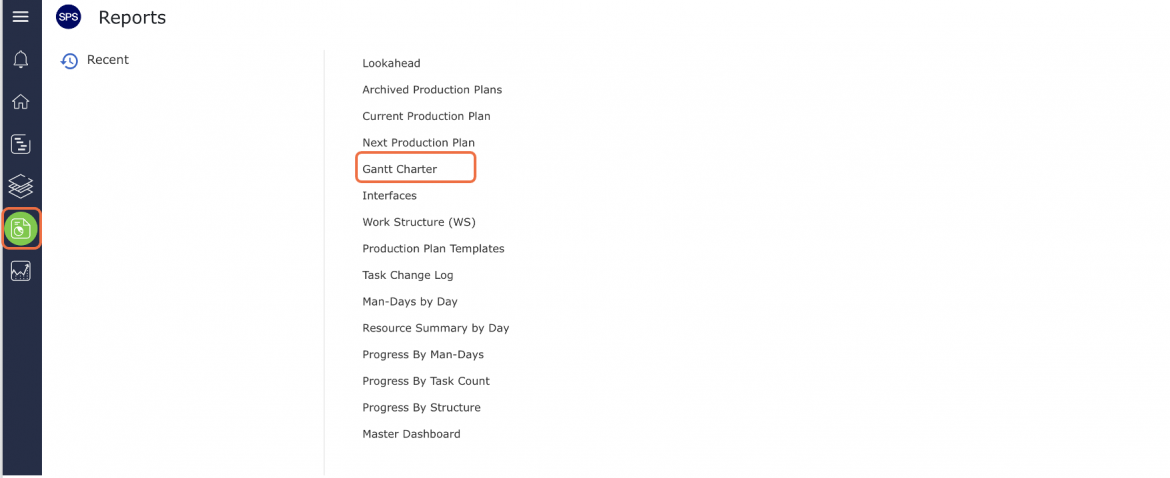
- Click the Integrated Menu to the left of the desired Milestone / Task, then select LRM Driver.
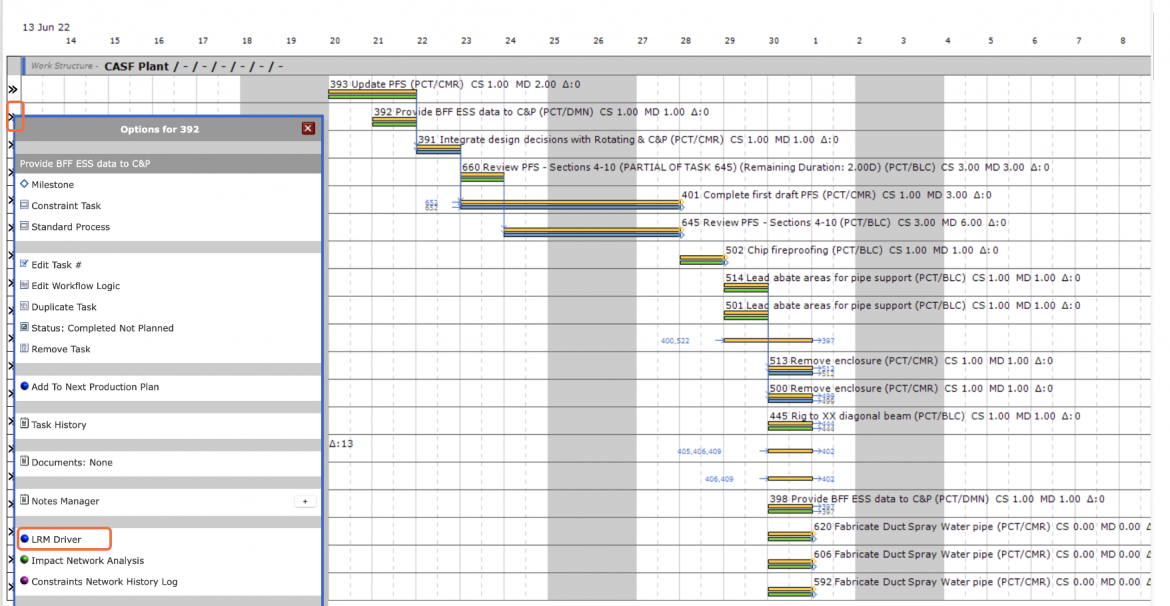
- The LRM Driver will open in a new window and display the Milestones / Tasks driving the LRM date of the selected Milestone / Task.
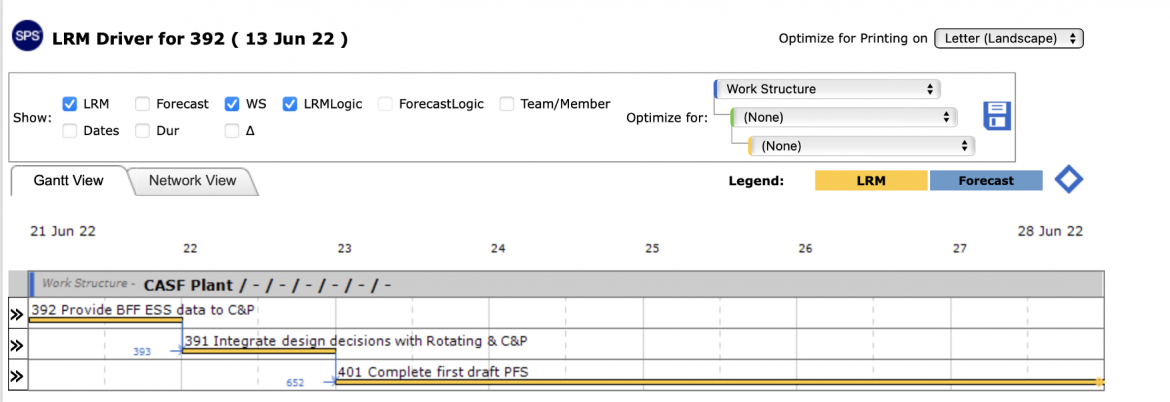
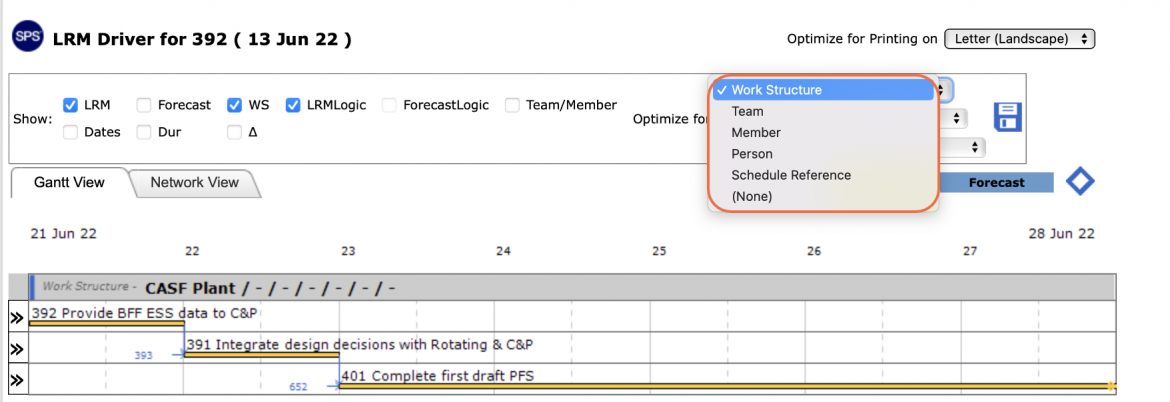
- The attributes shown on the LRM Driver can be limited by filtering by LRM, Forecast, Work Structure, LRM logic, forecast logic, team and team member, dates, and duration. Additionally, data can be visualized by the available Work Structure by selecting: Optimize For.
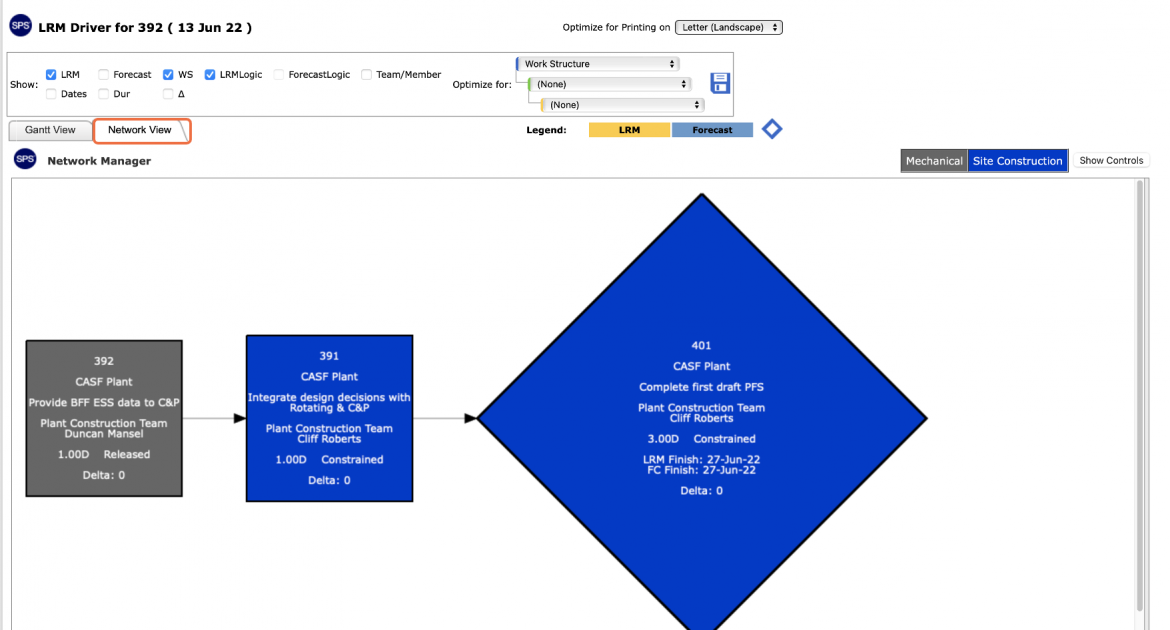
- The LRM Driver default display is the Gantt view, but can also be viewed in the Network Manager view by clicking the Network View.
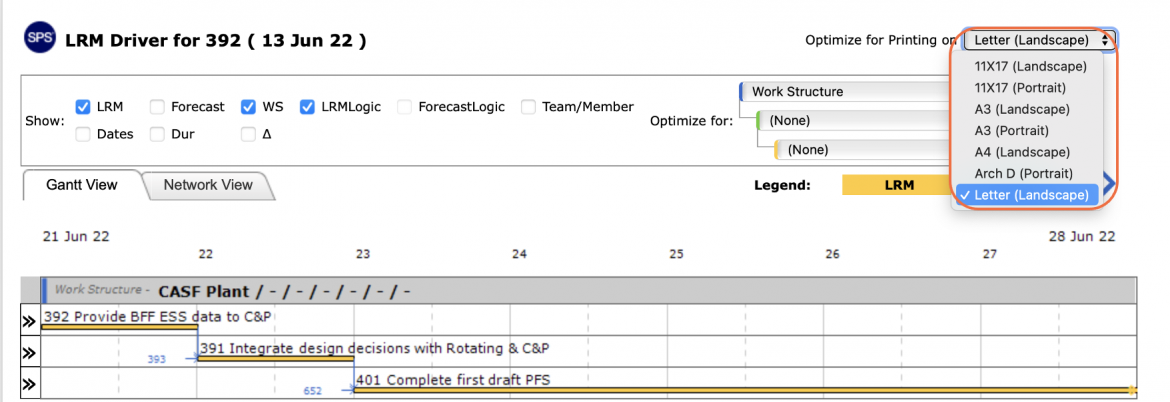
- To print the LRM Driver, select the desired paper size / orientation first under Optimize for Printing.
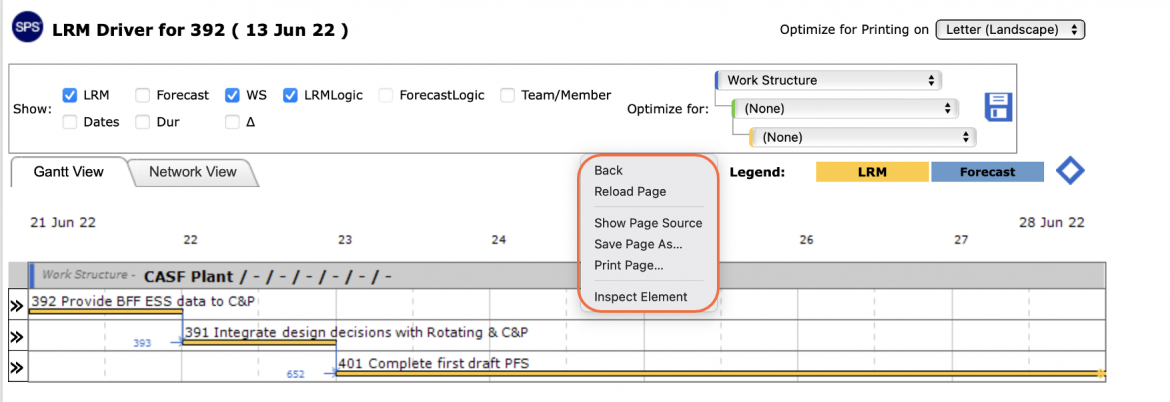
- Access to Print menu options may differ based on your browser. For instance, if you are using Internet Explorer, right-click in the white space outside of the LRM Driver and select Print from the menu or simultaneously press the Ctrl and P keys on your keyboard.
- The Print Dialogue box opens.
- Using the Print Dialogue box, change any desired print settings. Once all relevant printing settings have been modified, click the Print button.
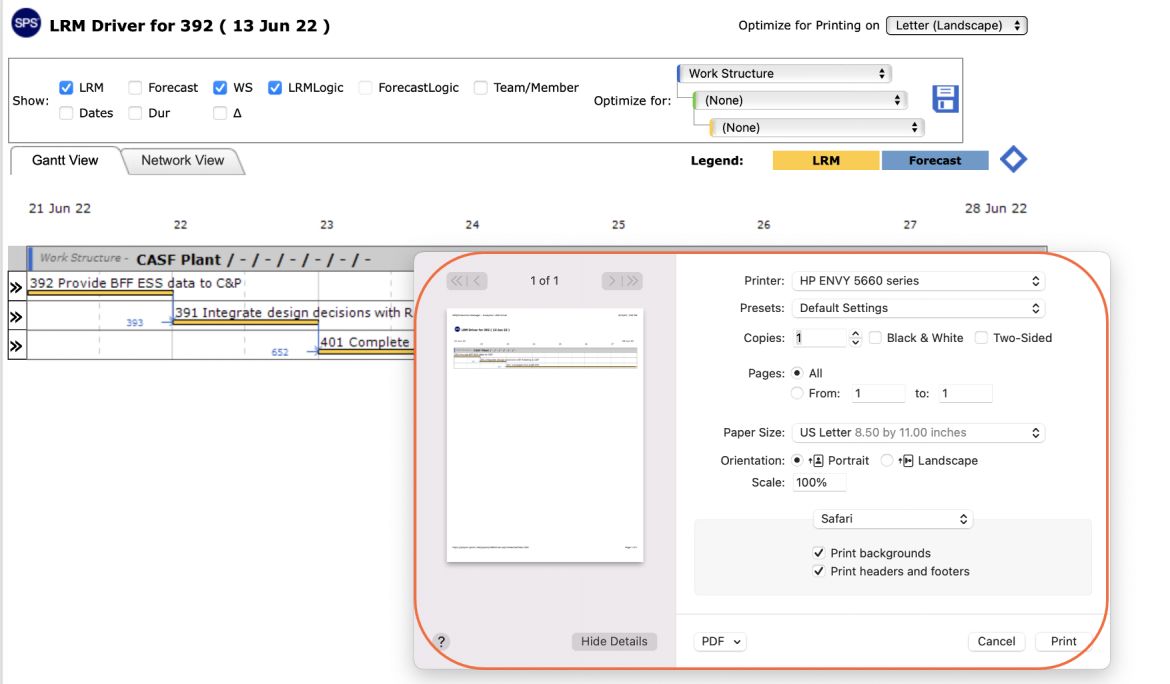
Note: Before printing, it is recommended you confirm the fit to the desired paper size.