
Optimization efforts include making sure work is completed as per agreed targets. However, as work is planned and executed, variability and ongoing adjustments to Production Schedules will impact forecast dates. It is therefore important to be able to understand what drives work. The Forecast Driver does this by enabling project teams to determine all tasks that drive the forecast date for a given Milestone / Task. It answers the question “What are all the tasks that drive the current forecast date for a certain Milestone / Task?” Forecast Driver for a Milestone may not be the same as the conventional Critical Path as the forecast date can be driven by many factors including certain tasks that are forecasted to occur in the future without any predecessor constraining those tasks. In SPS|PM, all tasks are initially forecasted to occur at their LRM dates unless the work is purposefully pulled forward using manual forecast or its predecessor.
This Decision-Support Mechanism is important because it will expose which tasks are critical for the selected Milestone / Task to start or be completed by a certain date. Forecast Driver depicts a single path rather than all paths leading to the selected Milestone / Task (only the path driving the forecast date). If a team desires to influence the forecast dates for a given Milestone / Task, they will have to work on all task drivers.
Note: Forecast Driver cannot be performed on a Released task where the task’s Forecast Date equals the current date.
The Forecast Driver is available in SPS|PM in the Lookahead view, Lookahead (Gantt Chart) view, and Gantt Charter view. To access the Forecast Driver use one of the following methods:
Method 1: Lookahead View
To access the Forecast Driver from the Lookahead view, complete the steps below:
- From the Main Navigation Bar select the Lookahead, then select Lookahead.
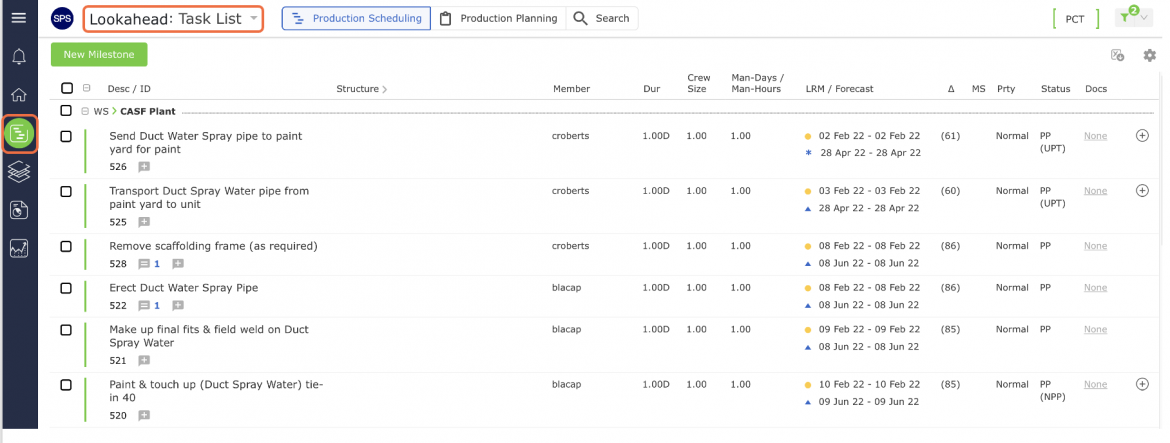
- From the Lookahead view, select the desired Milestone / Task by clicking once anywhere on the Milestone / Task row. Once selected, the task row will display a blue underline.
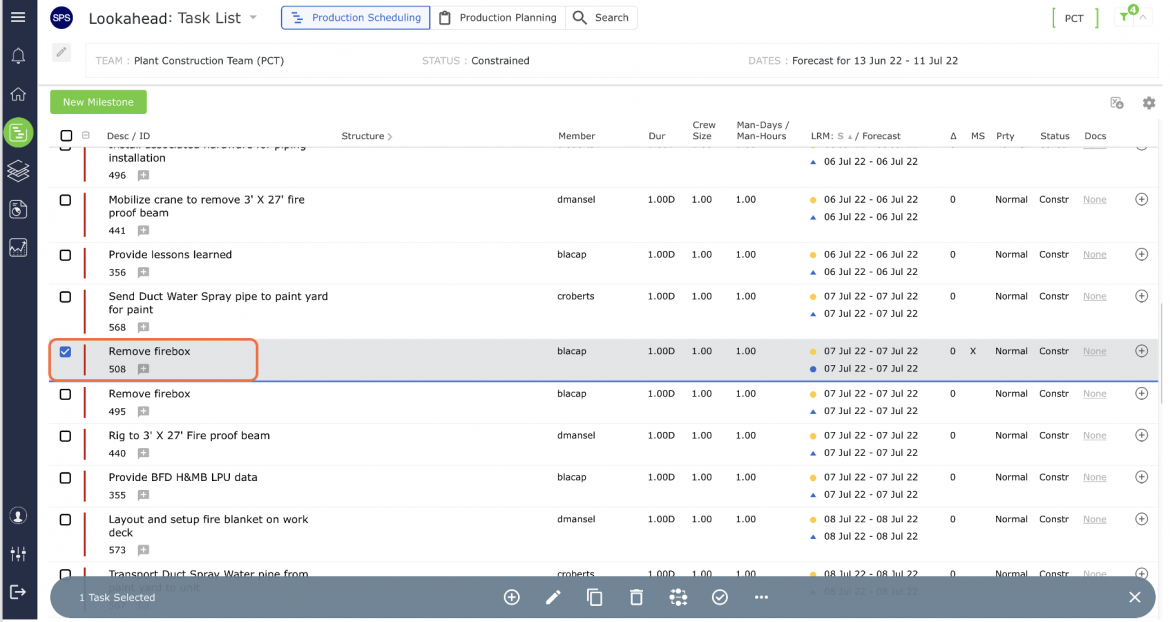
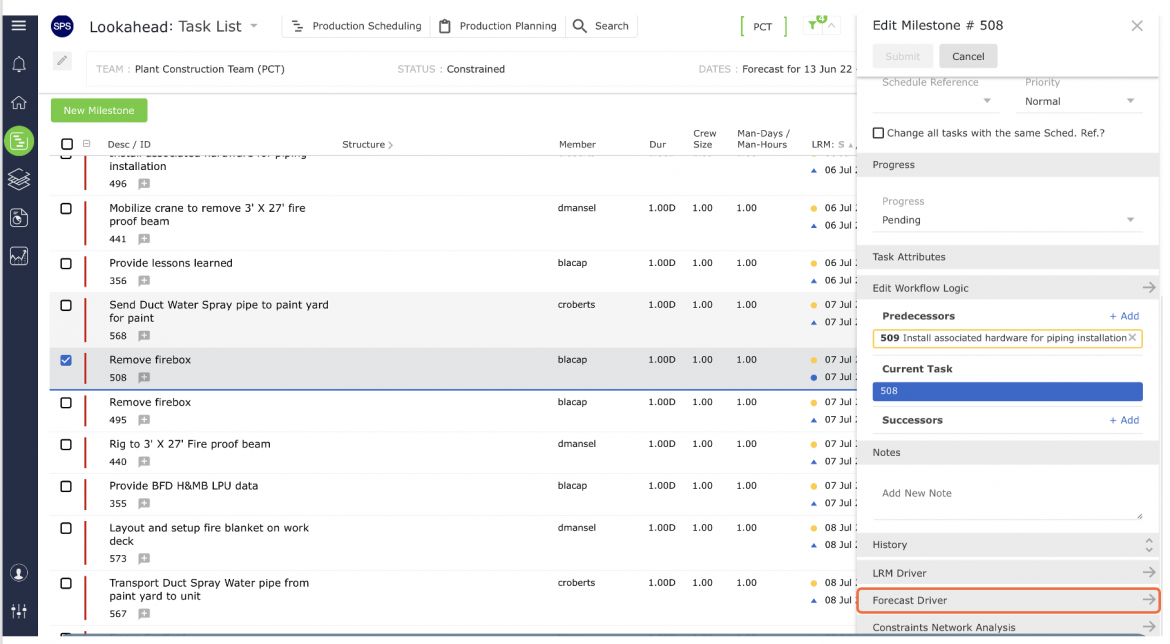
- Then from the Edit Milestone window select Forecast Driver.
Note: If a released task with no constraints is selected for analysis (versus a released task with one or more constraints), Forecast Driver will automatically be disabled. In this case, it is because no predecessors exist, so the task itself drives its own forecast date.
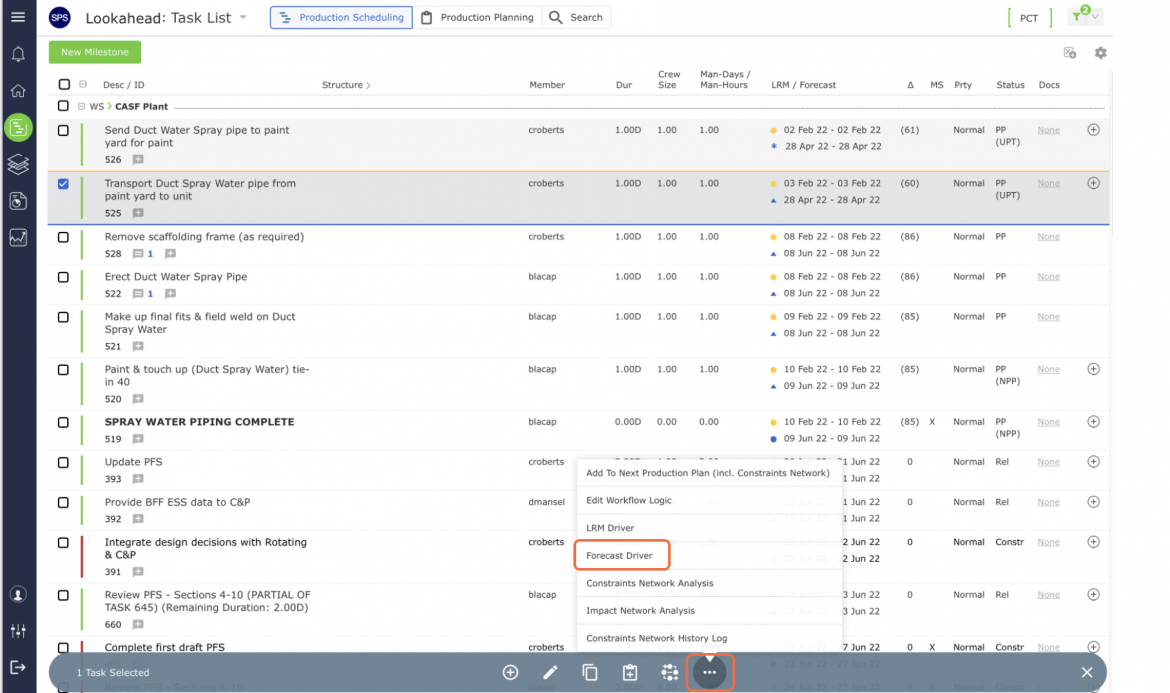
- Alternatively, from the Lookahead view, click the More Option on the bottom of the screen, then select Forecast Driver.
Note: If a released task with no constraints is selected for analysis (versus a released task with one or more constraints), Forecast Driver will automatically be disabled. In this case, it is because no predecessors exist, so the task itself drives its own forecast date.
- The Forecast Driver will open in a new window and display the Milestones / Tasks driving the forecast date of the selected Milestone / Task.
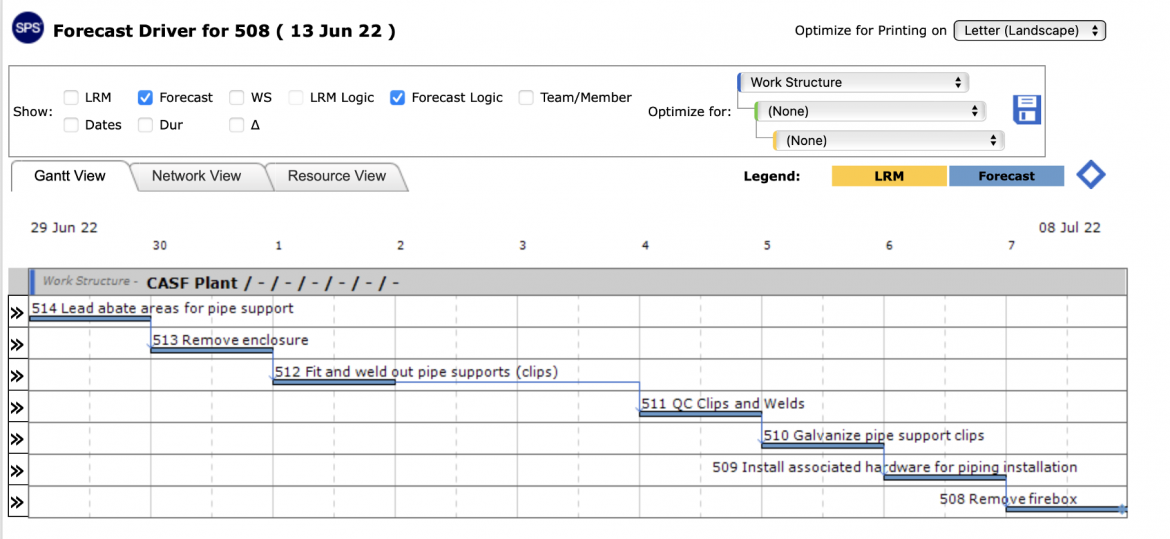
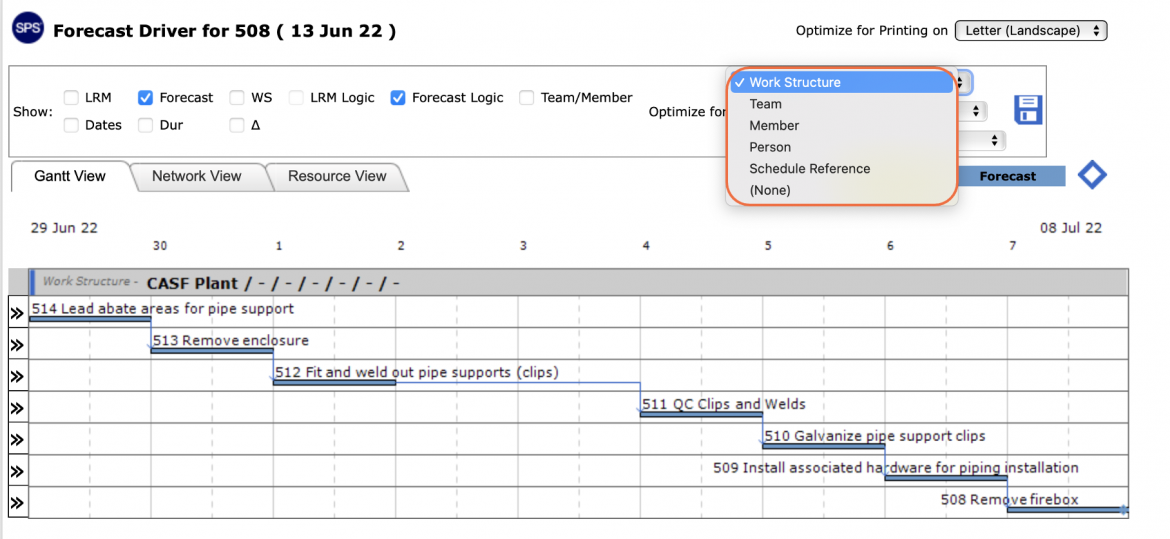
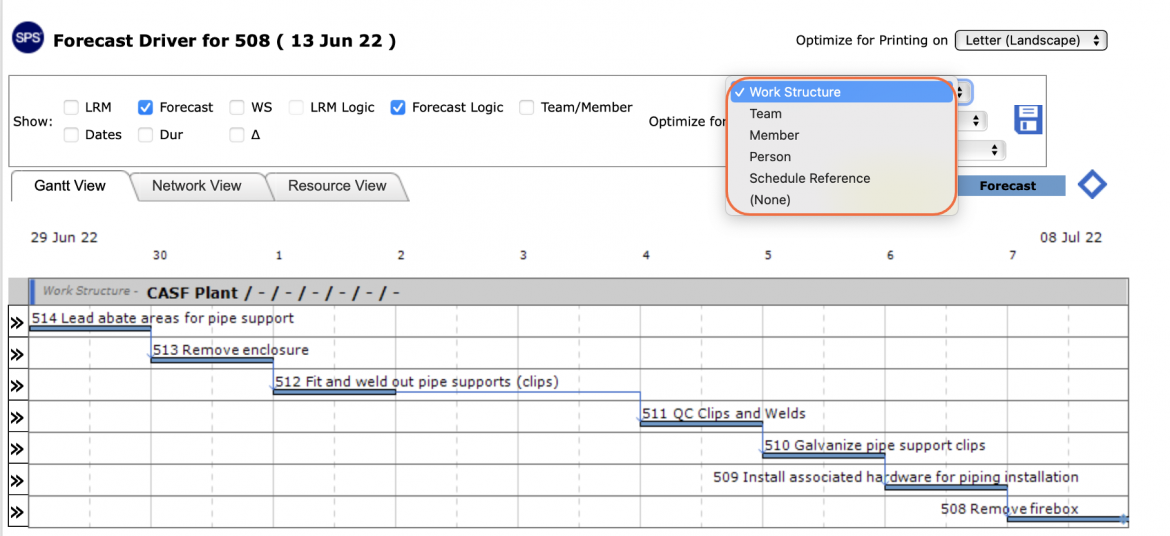
- The attributes shown on the Forecast Driver can be limited by filtering by LRM, Forecast, Work Structure, LRM logic, forecast logic, team and team member, dates, and duration. Additionally, data can be visualized by the available Work Structure by selecting Optimize For.
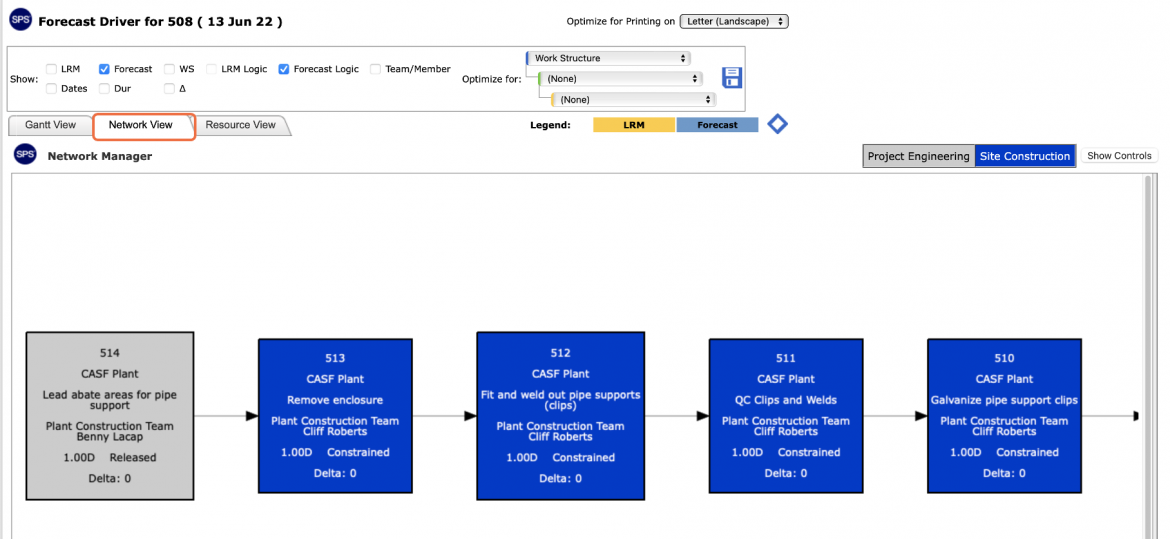
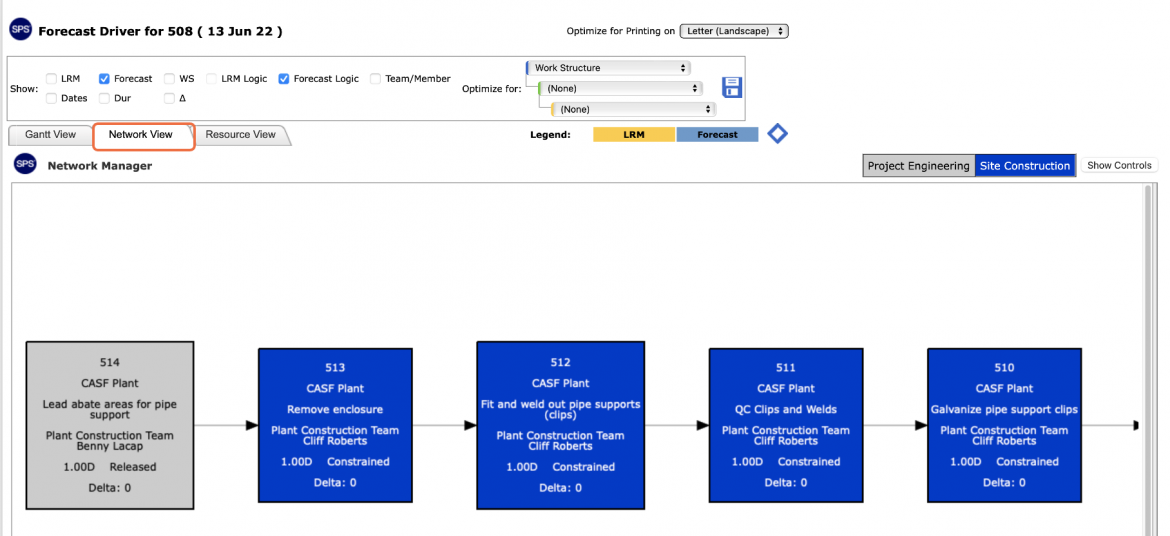
- The Forecast Driver default display is the Gantt view but can also be viewed in Network Manager view by clicking the Network View tab.
Method 2: Lookahead (Gantt Chart) View
To access the Forecast Driver from the Lookahead (Gantt Chart) view, complete the steps below:
- From the Lookahead, screen select the Gantt Chart from the dropdown.
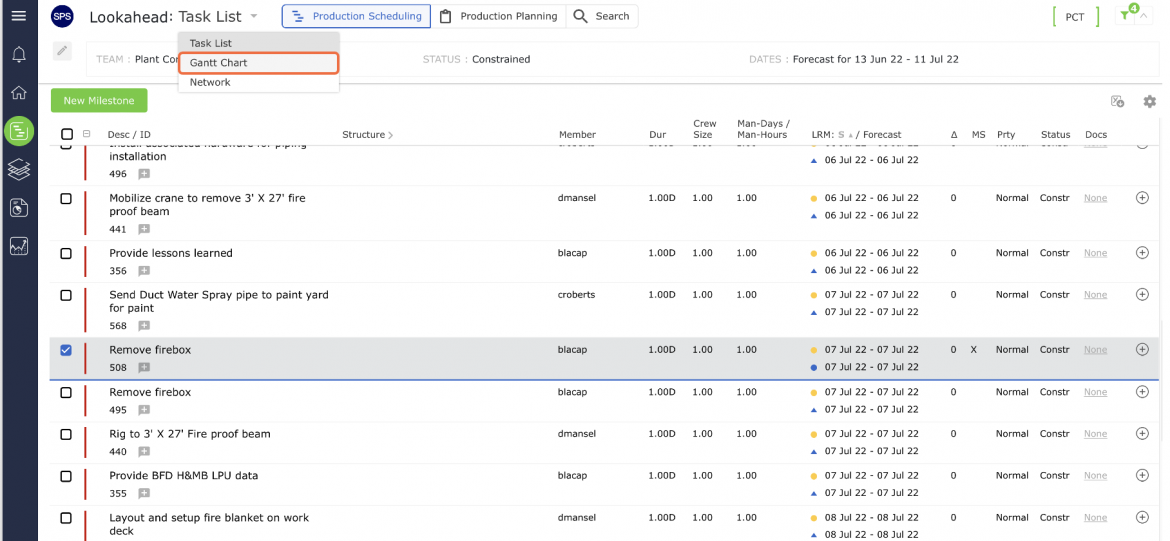
- Select the desired Milestone / Task by clicking once anywhere on the Milestone / Task row. Once selected, the task row will display a gray background. Then click the Show Forecast Driver control.
Note: If a released task with no constraints is selected for analysis (versus a released task with one or more constraints), Forecast Driver will automatically be disabled. In this case, it is because no predecessors exist, so the task itself drives its own forecast date.
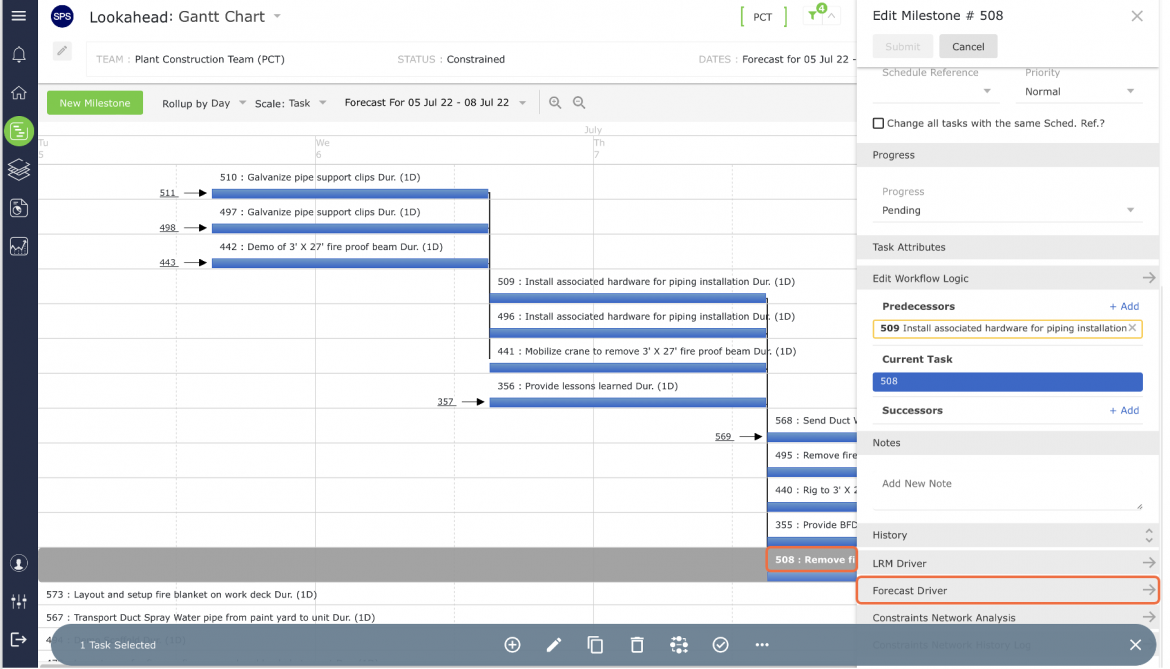
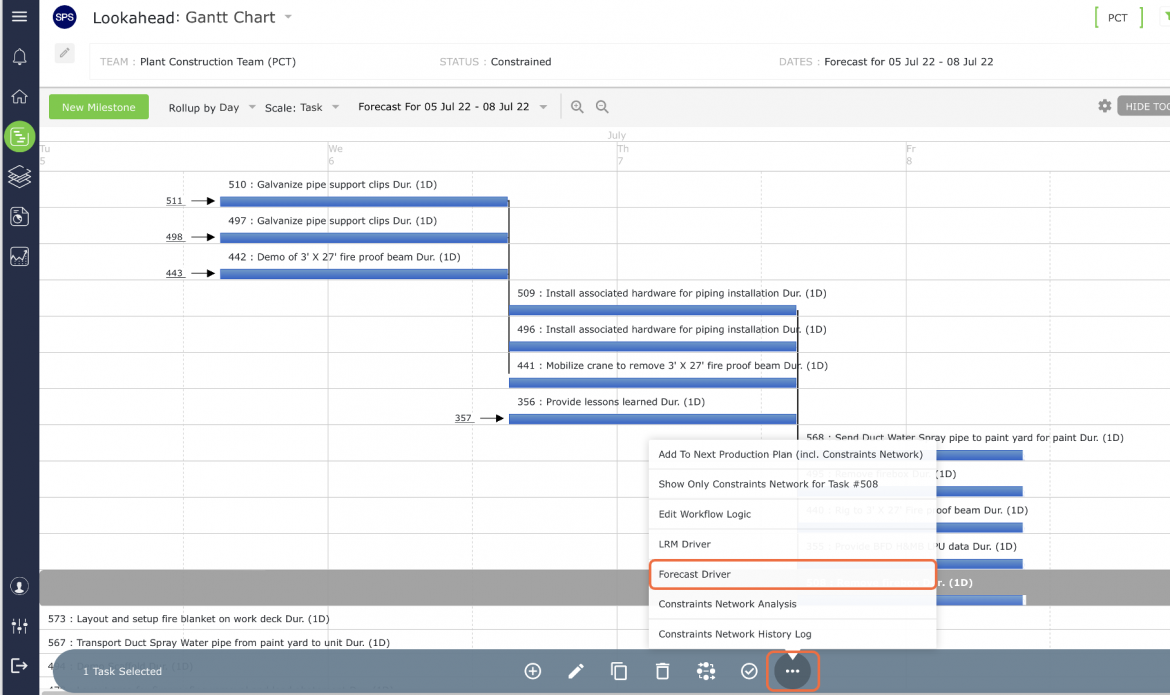
- Alternately, after selecting a task, click the More Options icon on the bottom toolbar, then select Forecast Driver.
- The Lookahead (Gantt Chart) will display the Milestones / Tasks driving the forecast date of the selected Milestone / Task
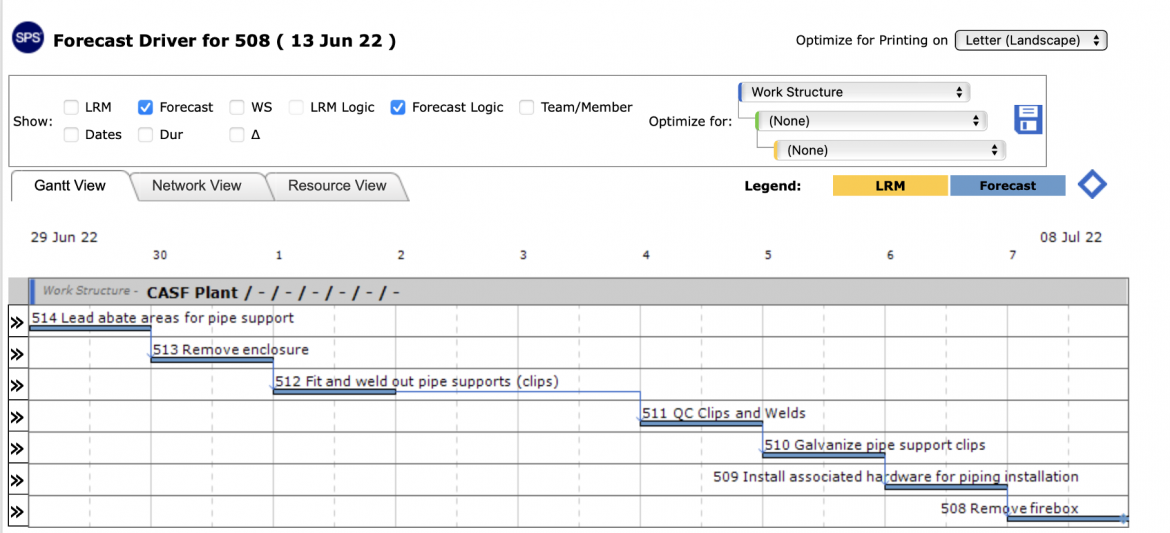
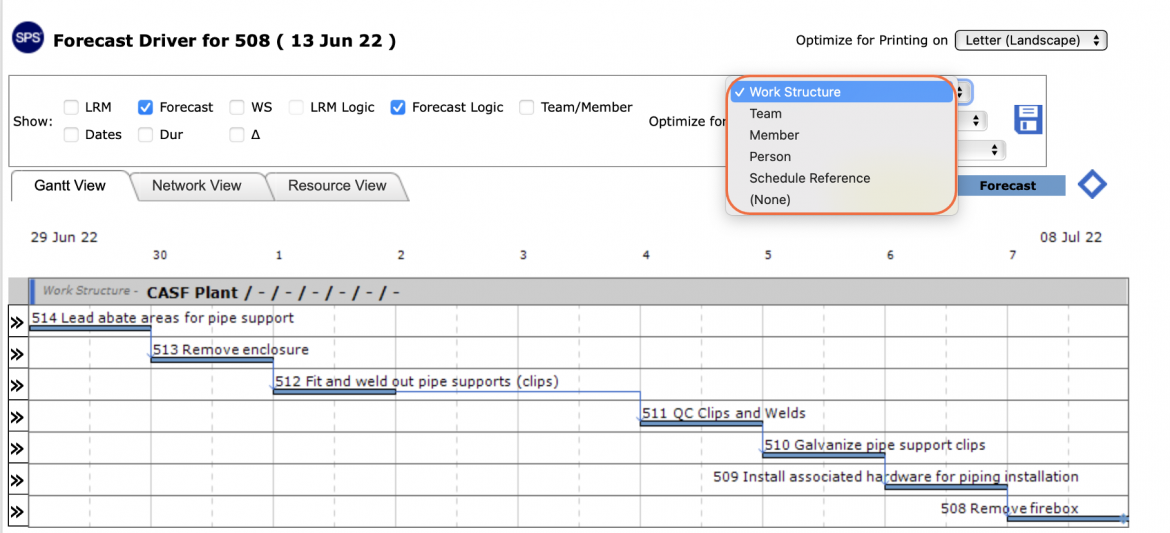
- The attributes shown can be limited by filtering by LRM, Forecast, Work Structure, LRM logic, team and team member, duration, etc. Additionally, data can be visualized by the available Work Structure and other attributes by selecting: Optimize For.
Method 3: Gantt Charter View
To access the Forecast Driver from the Gantt Charter view, complete the steps below:
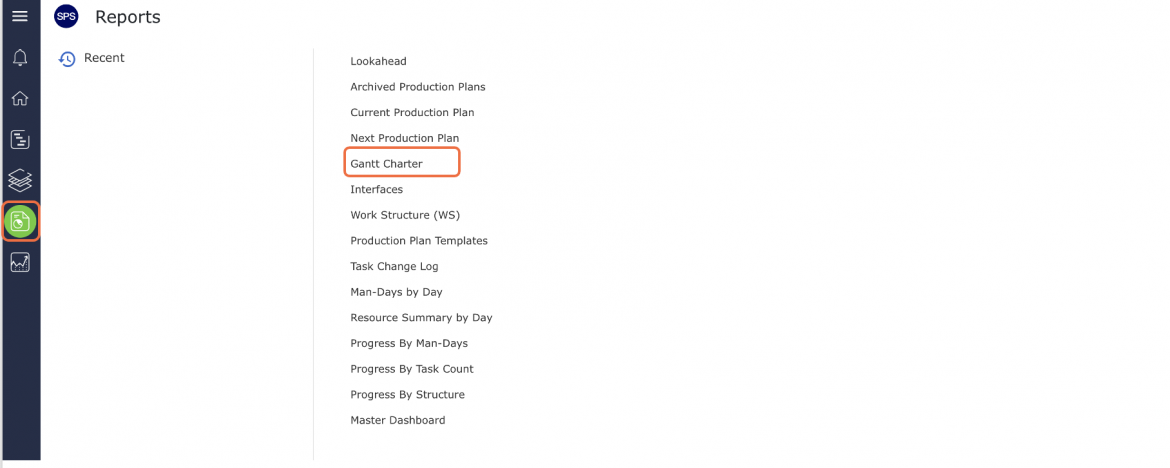
- From the Main Navigation Bar select the Reports, then select Gantt Charter.
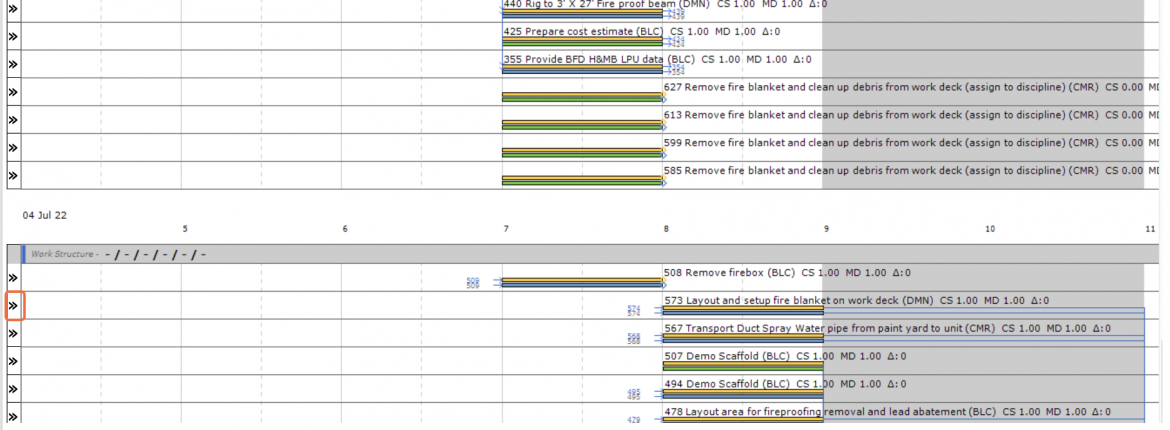
- Click the Integrated Menu to the left of the desired Milestone / Task.
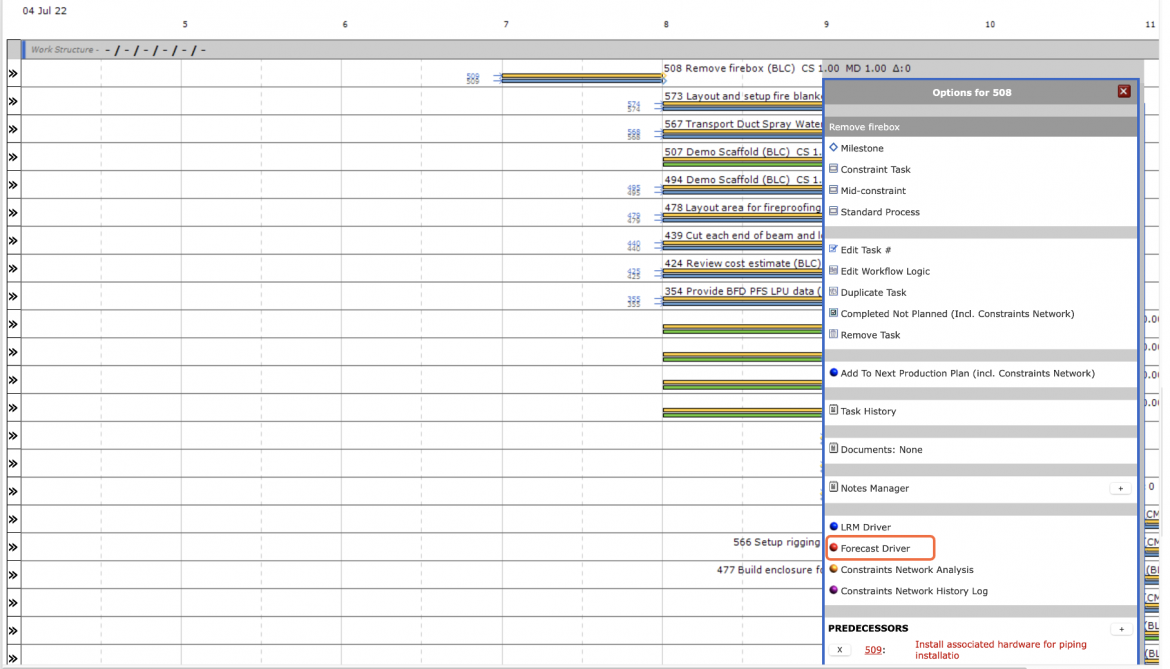
- Select Forecast Driver from the floating menu.
Note: If a released task with no constraints is selected for analysis (versus a released task with one or more constraints), Forecast Driver will automatically be disabled. In this case, it is because no predecessors exist, so the task itself drives its own forecast date.
- The Forecast Driver will open in a new window and display the Milestones / Tasks driving the forecast date of the selected Milestone / Task.
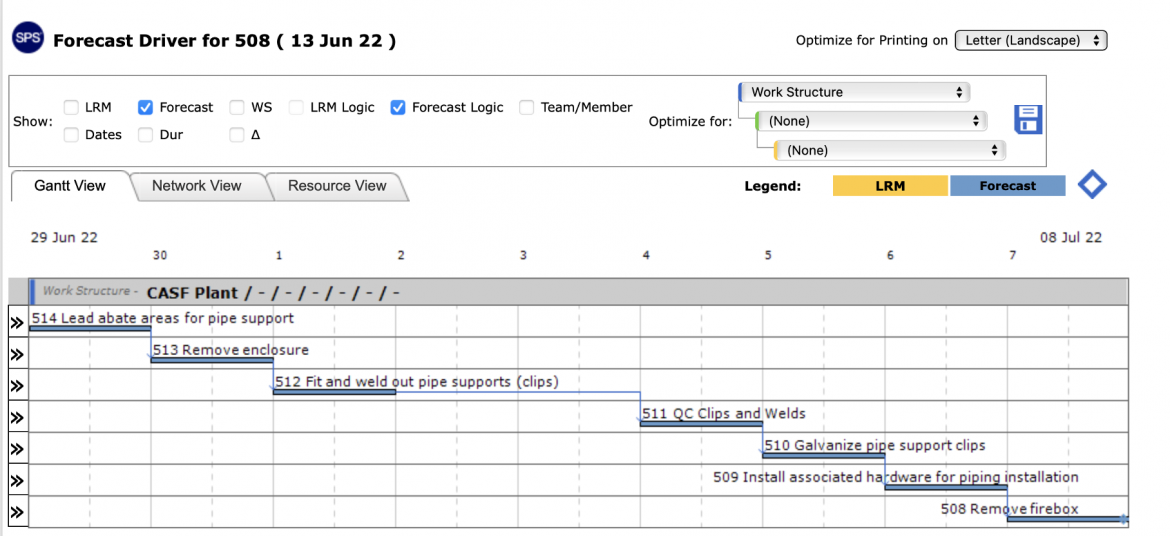
- The attributes shown on the Forecast Driver can be limited by filtering by: LRM, Forecast, Work Structure, LRM logic, forecast logic, team and team member, dates, and duration. Additionally, data can be visualized by the available Work Structure by selecting: Optimize For.
- The Forecast Driver default display is the Gantt view but can also be viewed in the Network Manager view by clicking the Network View tab.
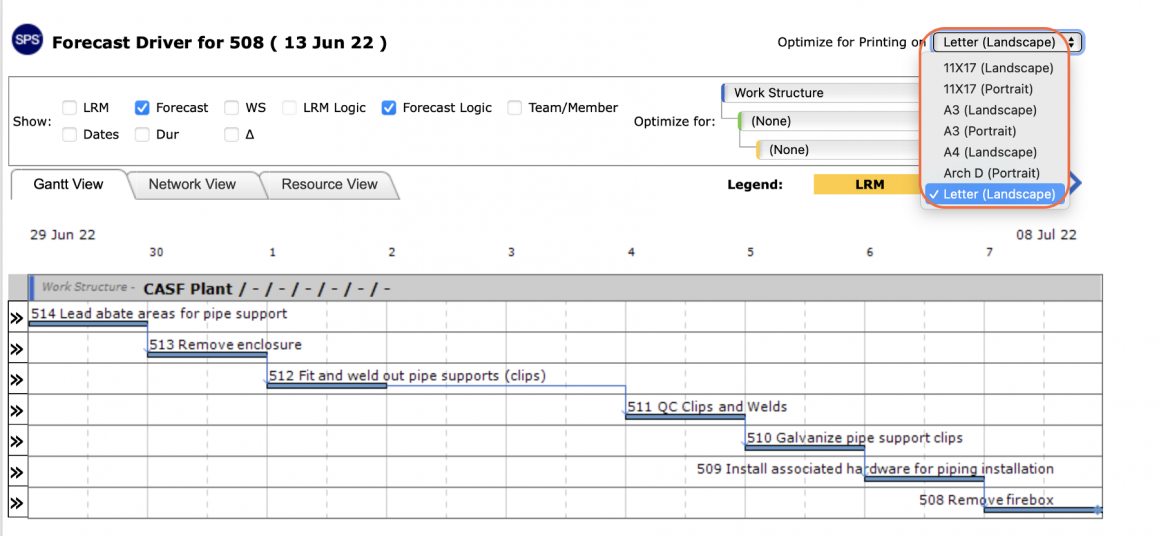
- To print the Forecast Driver, select the desired paper size / orientation first under: Optimize for Printing on.
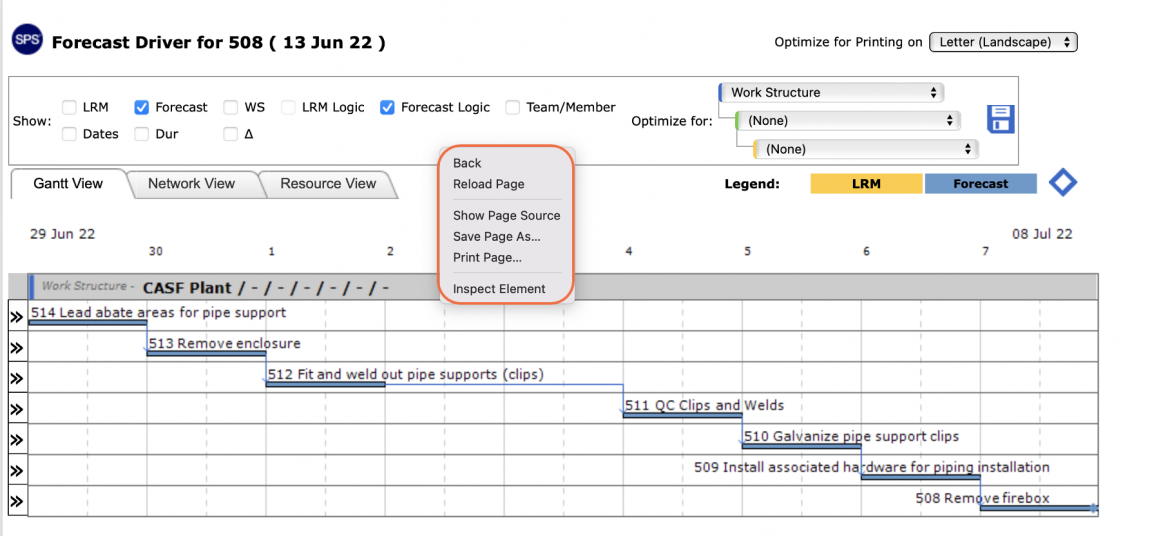
- Access to Print menu options may differ based on your browser. For instance, if you are using Internet Explorer, right-click in the white space outside of the Forecast Driver and select Print from the menu or simultaneously press the Ctrl and P keys on your keyboard.
- The Print Dialogue box opens.
- Using the Print Dialogue box, change any desired print settings. Once all relevant printing settings have been modified, click the Print button.
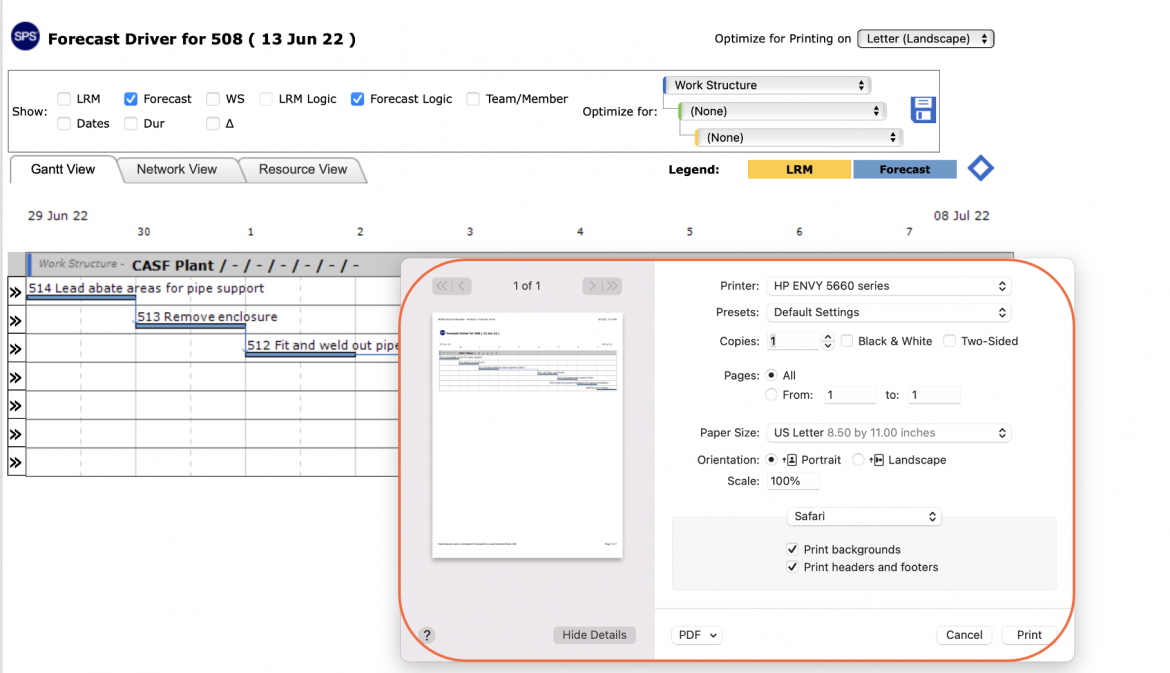
Note: Before printing, it is recommended you confirm the fit to the desired paper size.