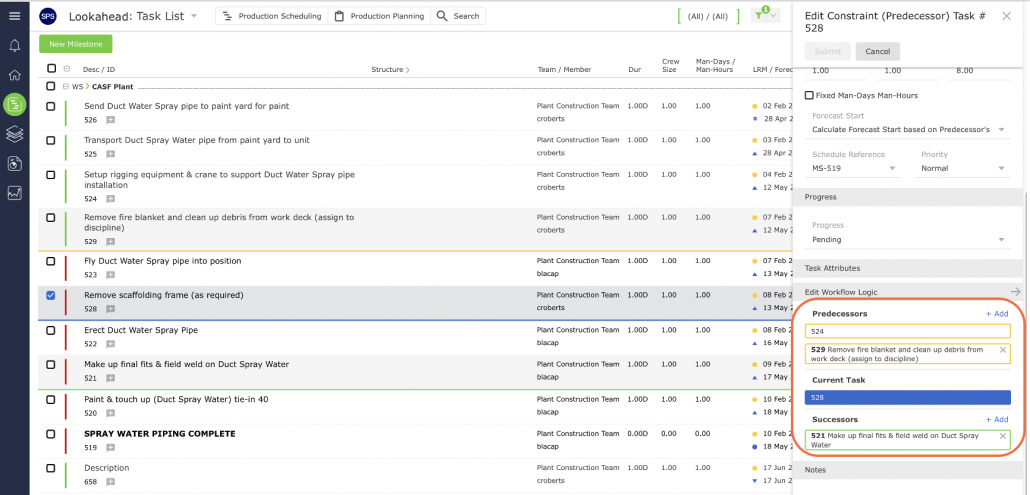
Workflow logic is the set of dependency relationships between the individual tasks, which make up a workstream. In other words, the workflow logic is the order or sequence of the tasks in a workstream. The creation of these relationships is accomplished by, “creating the workflow logic.” As a specific stream of work progresses, it is often necessary to insert a new task between two existing tasks in the Lookahead: Task List and to add or remove dependency relationships between the tasks to accurately represent the new flow of work. Any changes of this type are accomplished by “editing the workflow logic” relating to the tasks.
Adding a dependency relationship can mean linking either a new predecessor or a new successor to a specific task in a workstream. This can be performed in Lookahead: Task List view using two methods as detailed below.
To add a dependency in the Lookahead: Task List view, complete the steps below for the desired option:
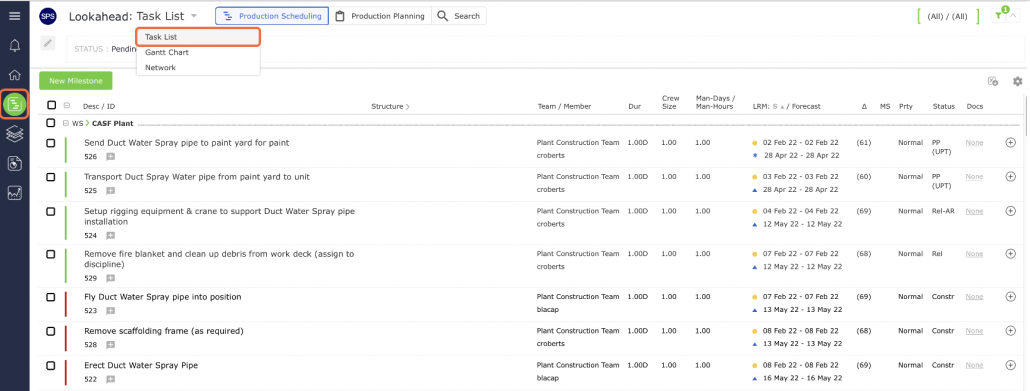
- From the Main Navigation Bar select Lookahead, then select Task List.
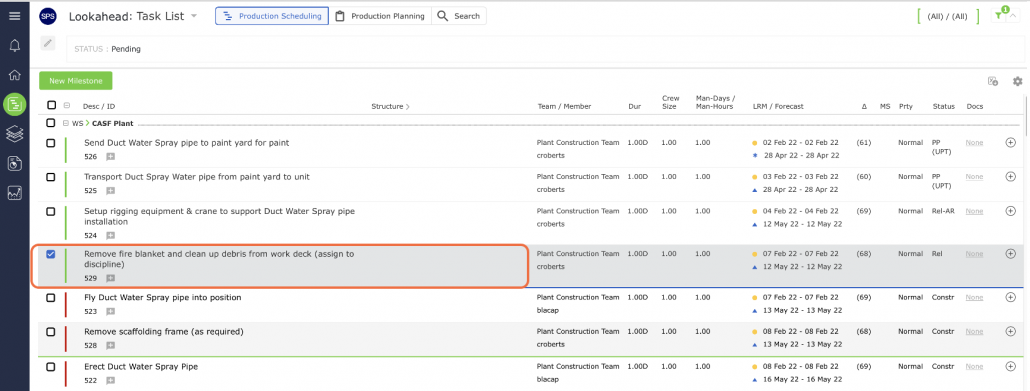
- Select the Milestone / Task you wish to edit the workflow logic on by clicking once on the task description or by selecting the checkbox on the left of the Milestone / Task row. Once selected the task row will highlight and underline in blue.
Method 1: Edit Workflow Logic
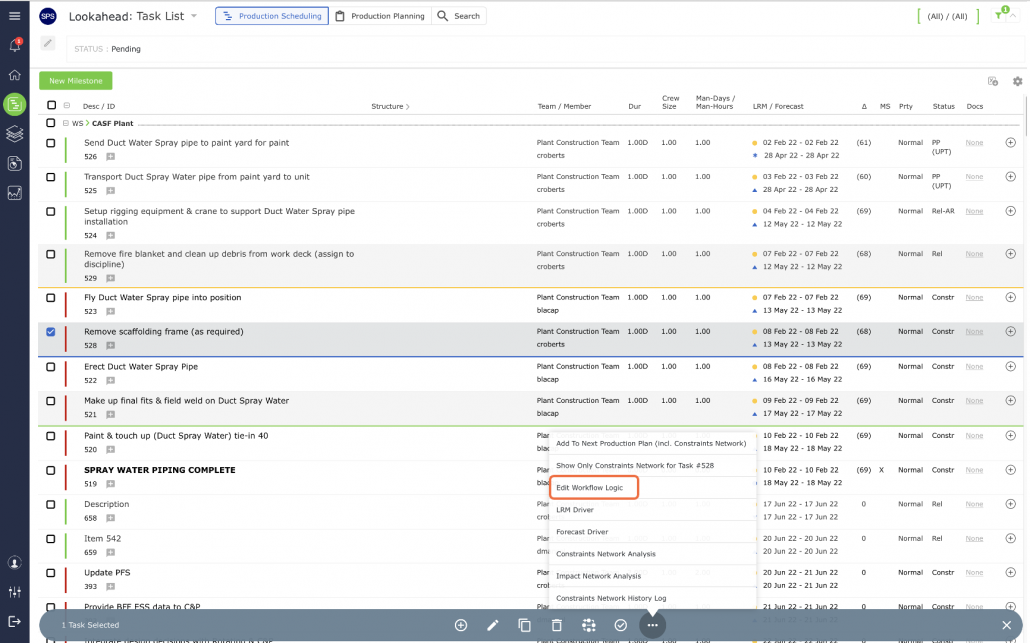
- Click the more options icon on the bottom toolbar and select Edit Workflow Logic.
- The Edit Workflow Logic window opens as shown in the image below and displays the task details for the selected task, any direct predecessor tasks, and any direct successor tasks. The selected task is located in the center of the window, any predecessors are shown above, and any successors are shown below. Each task is bordered by a color block according to the legend shown on the top left of the page (Yellow = Processors, Blue = Selected and Green = Successors). The downward pointing arrows show the flow of work.
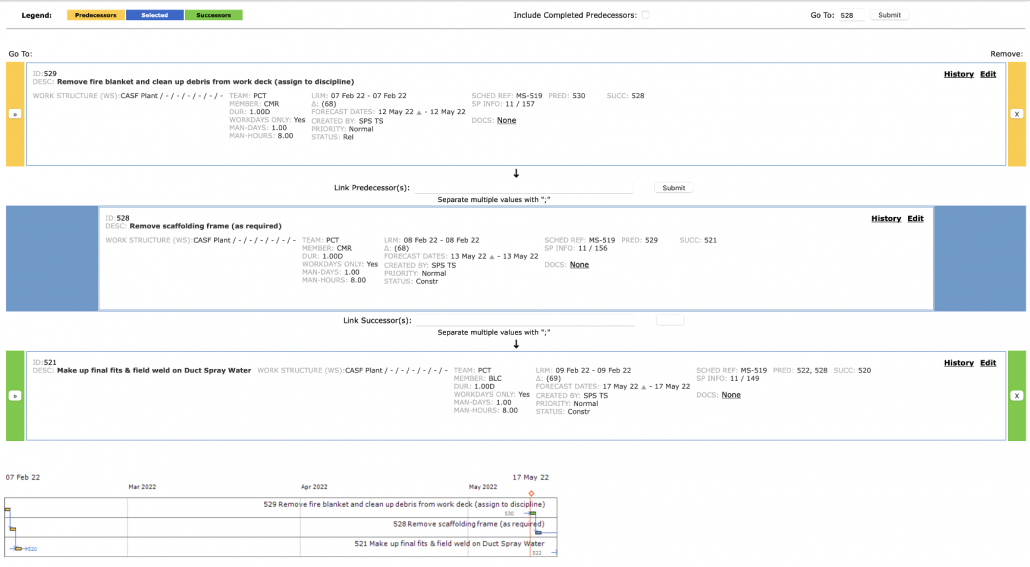
To create workflow logic (link tasks):
A new predecessor may be linked to the selected task by entering the Task ID of the desired predecessor in the Link Predecessor(s) field as shown in the image below. This requires that the new predecessor already be present in the Lookahead, so any new task creation must be done before editing the workflow logic.
A new successor may be linked to the selected task by entering the Task ID of the desired successor in the Link Successor(s) field. Similar to adding a predecessor, any new successors must already be present in the Lookahead, thus new task creation must be completed before editing the workflow logic.
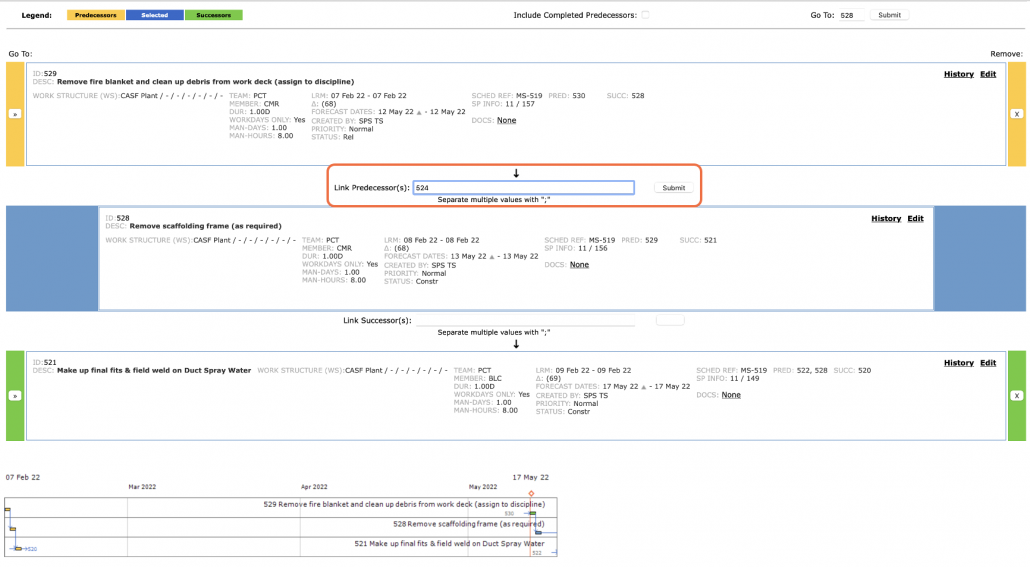
- When finished entering desired Predecessor(s) or Successor(s) Task ID’s, click the Submit button. The Edit Workflow Logic window will then display the new dependency relationships.
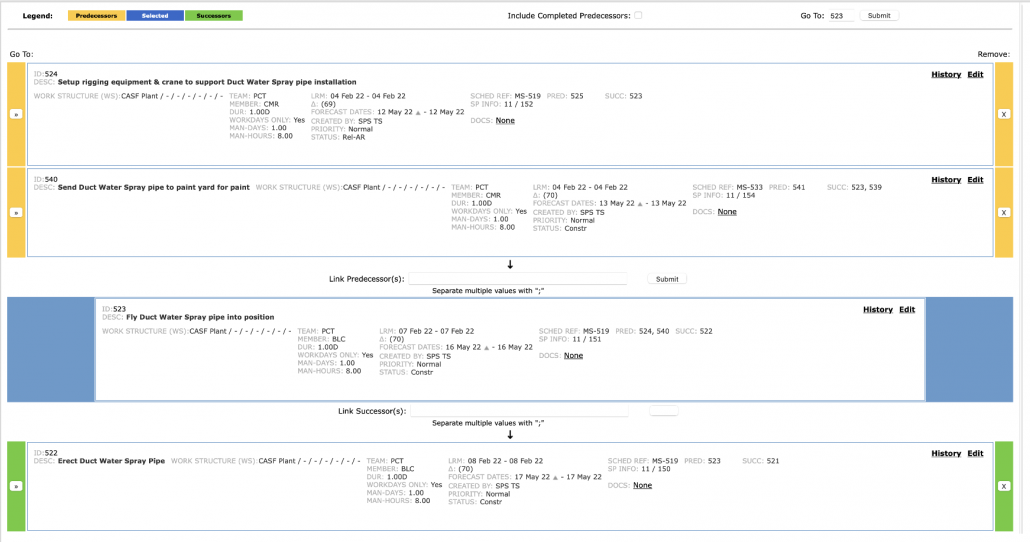
- To make further edits by changing the selected task or navigating through the workflow, click the “>>” to the left of the predecessor or successor to make that task the selected task. Changing the selected task re-centers the Edit Workflow Logic window on the chosen predecessor or successor to allow further modification of the workflow logic. All direct predecessors and successors for that newly selected task will then appear and the workflow can be edited using the method described above.
Method 2: Add “+” Button
- Click the Edit Task icon on the bottom toolbar to open the Edit Constraint (Predecessor) Task # window. to the left of the Milestone / Task and scroll until the Predecessors and Successors are visible.
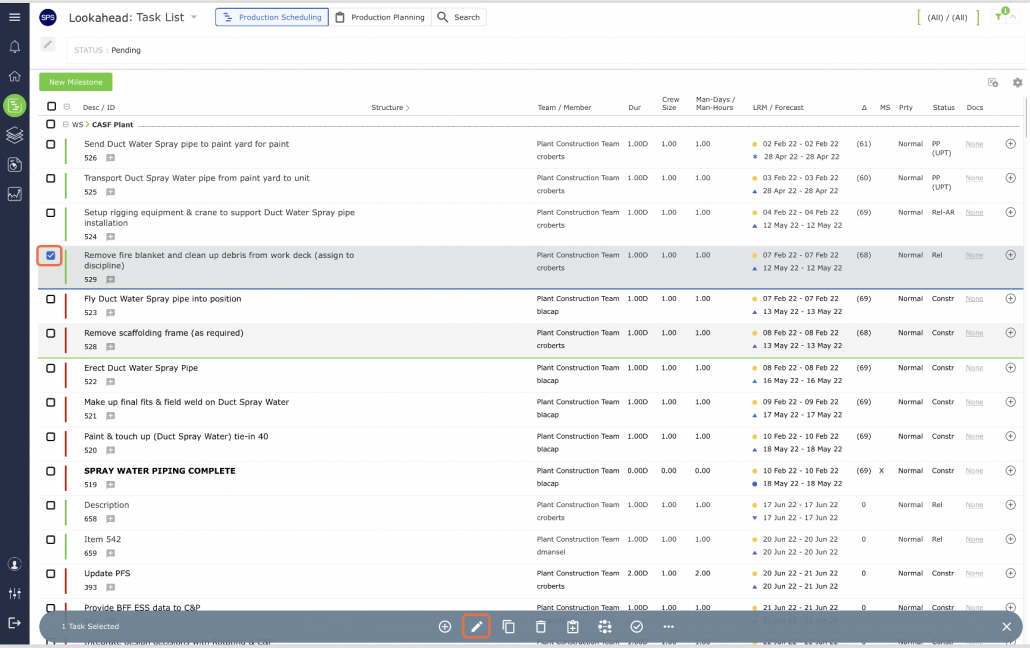
- To add Predecessor(s) or Successor(s), click the “+ Add” and enter the desired Task ID, and then hit the return key on your keyboard. The edits will then be reflected in the Lookahead view.