
To create a new standard process using Network Manager, complete the steps below:
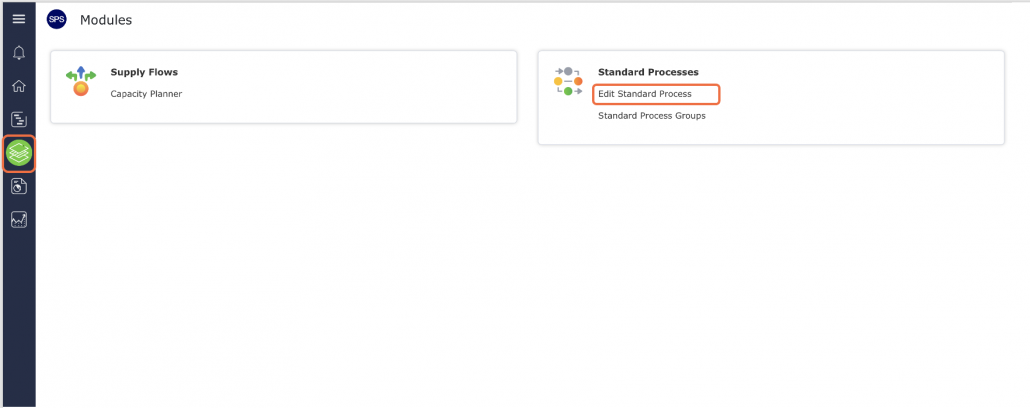
- From the Main Navigation Bar select Modules, then select Edit Standard Process.
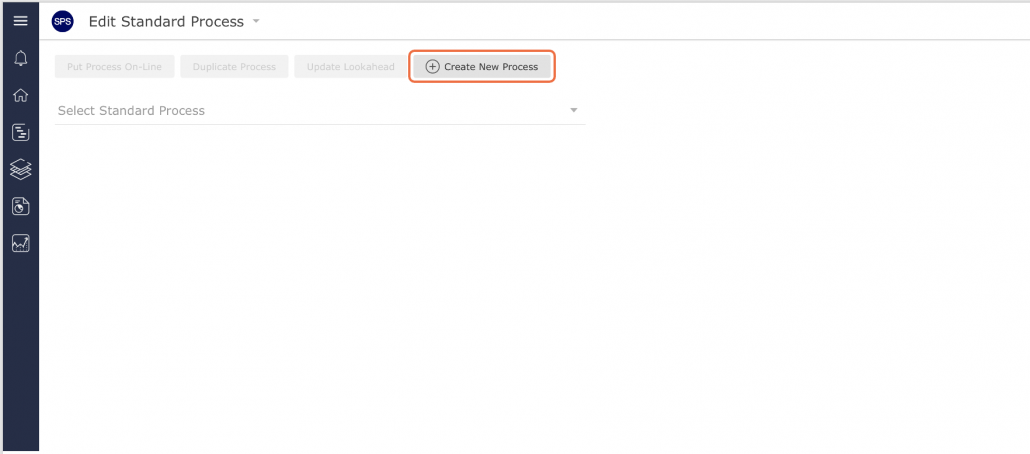
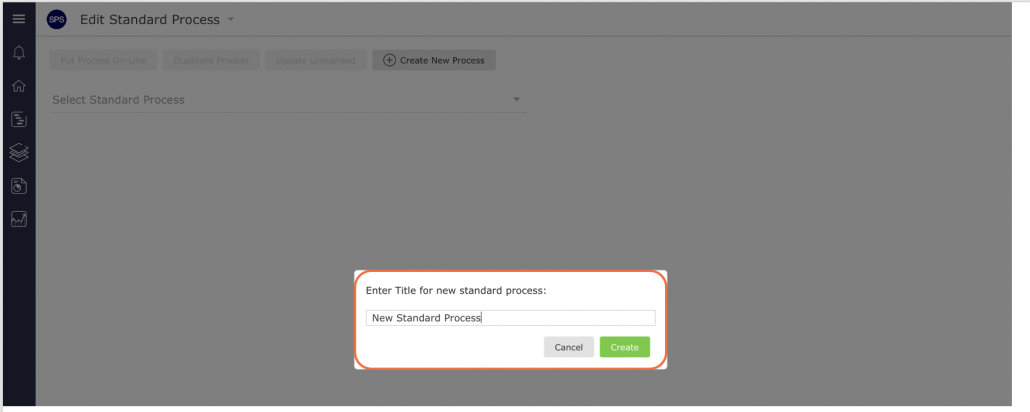
- Click the Create a New Standard Process button. Enter the new standard process title following the project’s agreed-upon nomenclature then click the OK button. Consistency in naming standard processes is important to facilitate identification when using and editing standard processes in the future, as projects can easily have more than a hundred standard processes.
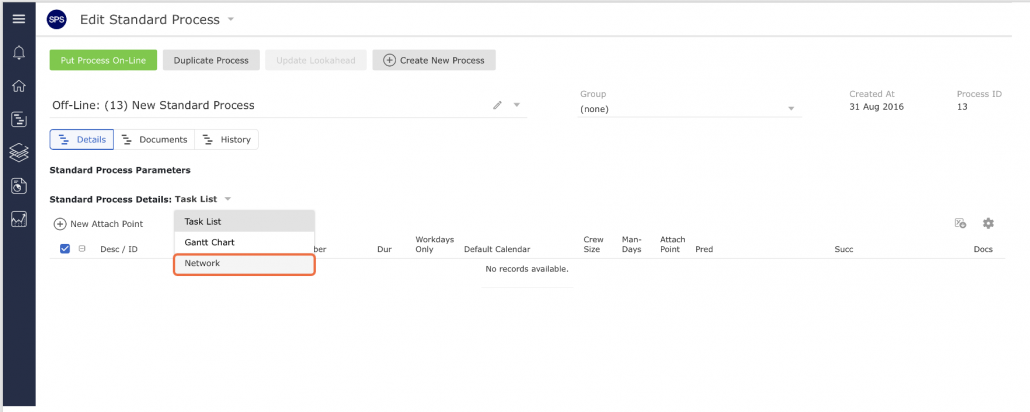
- To open the Network Manager, click the Network option in the Standard Process Details dropdown list.
- The Controls appear at the top of the window as shown in image below. The Controls allow you to edit, review, and print the standard process. The image below explains each Control.

- Create the attach point (the end task of the process) used to link to a Milestone / Task in the Production Schedule when the standard process is inserted, by clicking the Insert a New Milestone control.
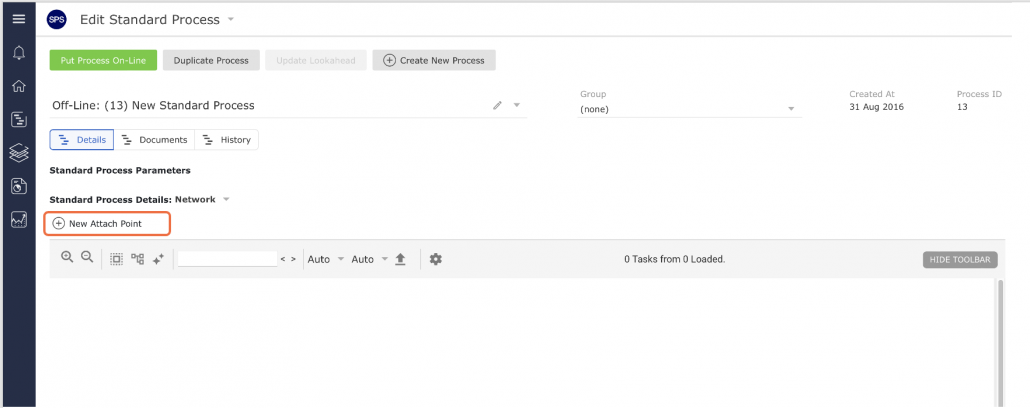
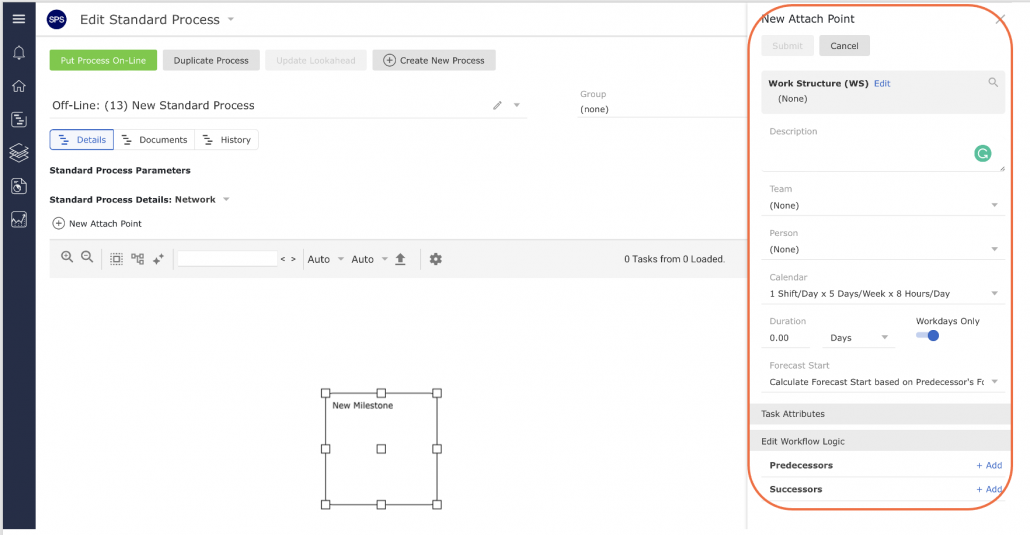
- In the New Attach Point window, populate the attach point details following the parameters below then click the Submit button. Note: If the new attach point does not display, click the Refresh control.
| Parameter | Description |
|---|---|
| Work Structures | Select values for levels 1-7 of the Work Structures according to the defined Work Structures for your specific project |
| Team / Member | Team and members who will own and complete the work |
| Description | Start the description of the task activity with a verb such as ‘Install,’ ‘Develop,’ ‘Formulate,’ ‘Fabricate,’ Approve,’ etc. Task description should be specific and a measurable quantity, no greater than the Planning Horizon (e.g., one day, one week, etc.) Level of detail should represent measurable hand-off to the successor activity |
| Duration | Proposed time task will take to complete |
| Forecast Start | Default is based on a ‘Continuous’ Workflow; other options are used when tasks need to start at a different point than anticipated (see section Task Dates for more information) |
Constraint Analysis and task dependency are the core of Production Scheduling. Any task is simply an item of work with a specified duration, for which a single individual is responsible. Within SPS|PM, two tasks are connected by a dependency relationship when work on one task cannot begin before all work on the other has been completed. The dependent task is known as a successor, while the “providing” task is a predecessor or constraint.
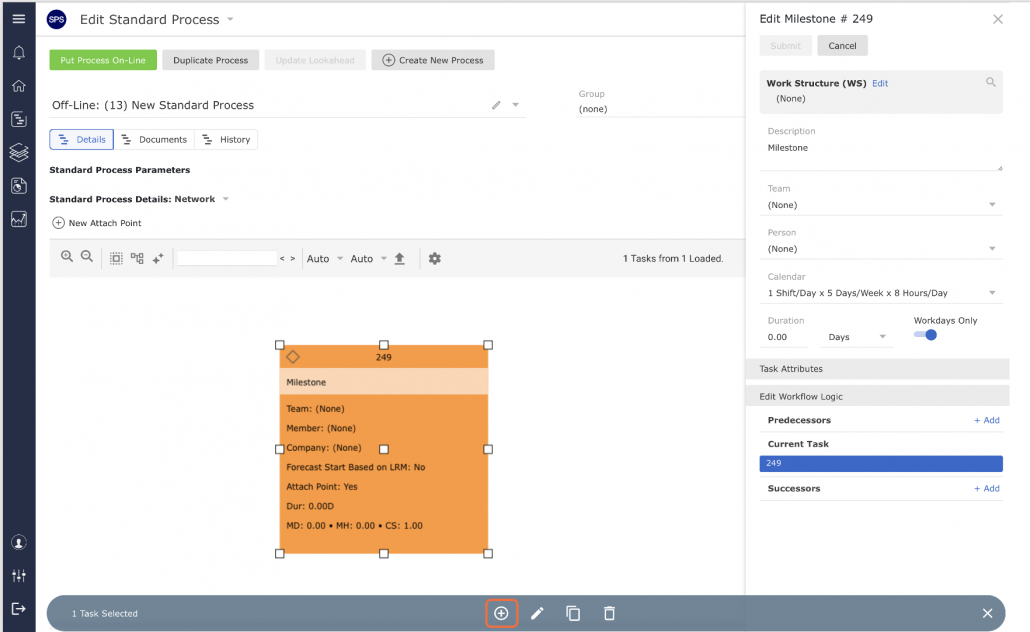
To add constraints to the attach point, select the attach point by clicking its shape. Once selected, click the Insert a New Constraint Task control.
- The New Constraint Task window opens. Populate New Constraint Task window the using the parameters described in above Step 8 and click the Submit button when complete.
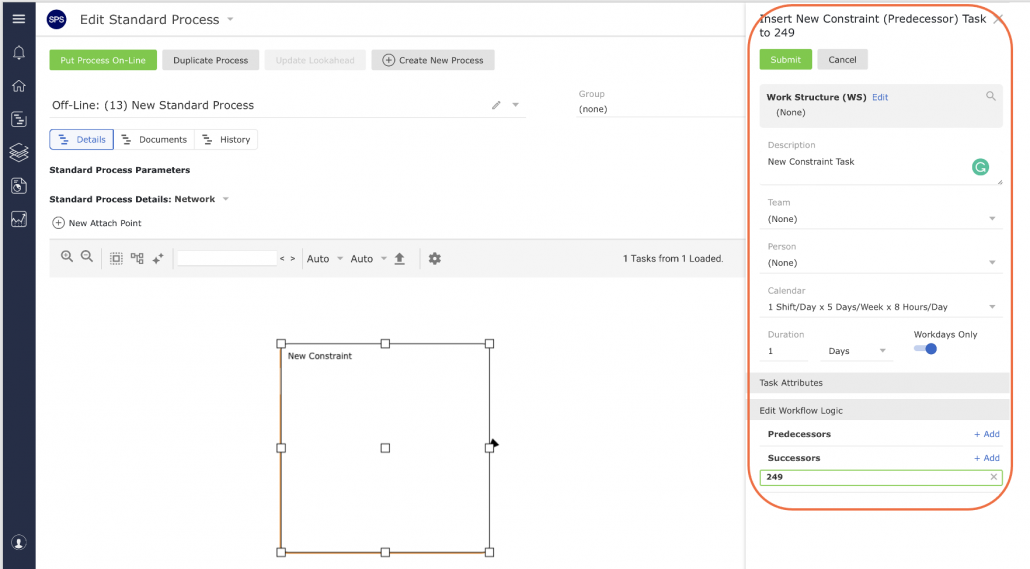
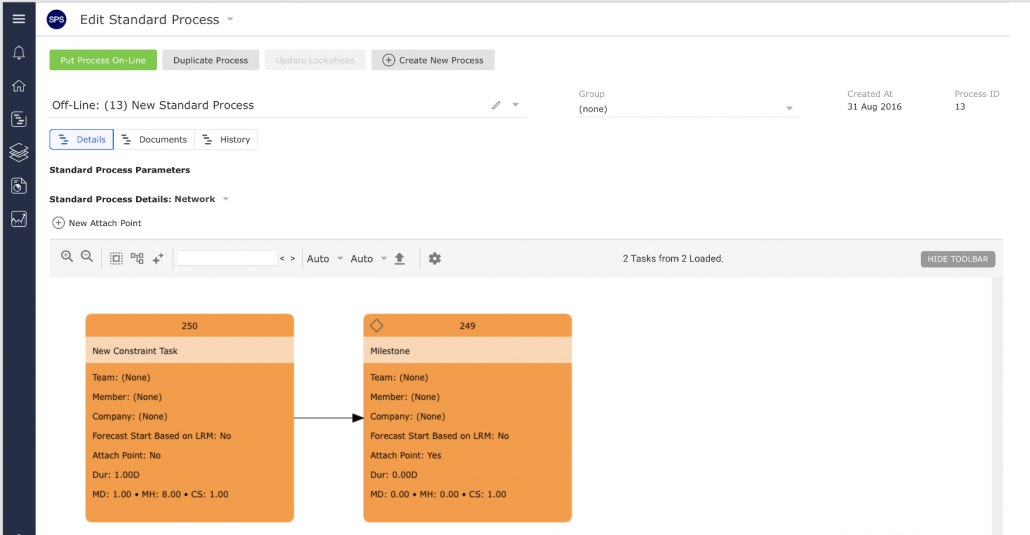
- The new constraint task appears as a predecessor to the attach point.
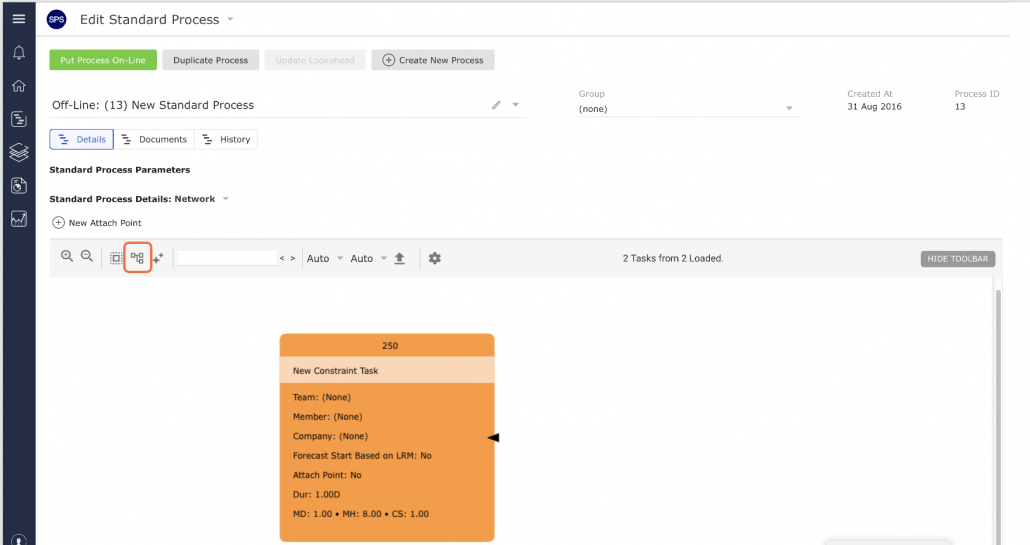
- You may need to click the Refresh control if the task shapes and colors are not properly rendered as shown in above image. Below image shows Network Manager after refresh.
- To continue adding constraint tasks, repeat above Steps 9 – 12, selecting the appropriate task or attach point to constrain each time.