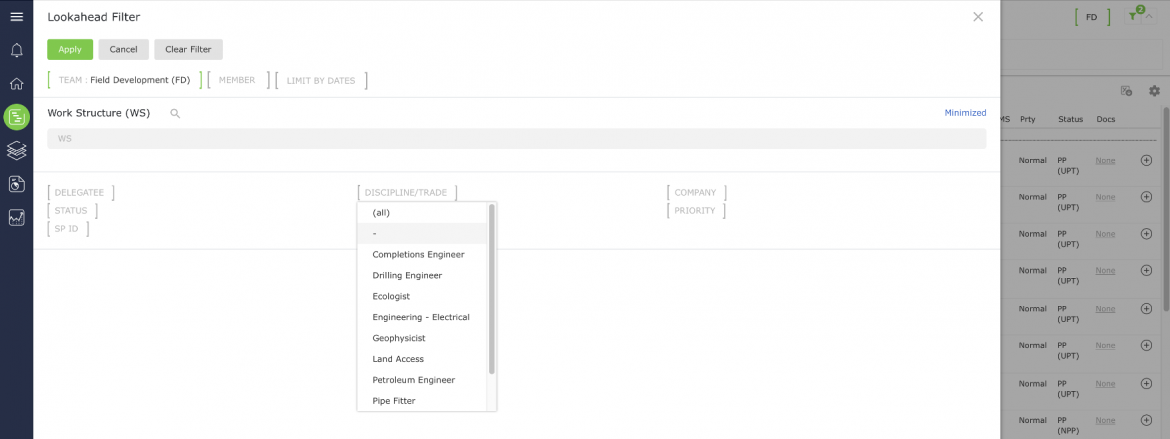
Understanding execution across multiple workflows and teams is critical to effectively delivering project objectives. As project complexity increases, the need to view and optimize work across a selected group of teams, Disciplines / Trades, or even companies, increases.
The Manage Custom Groups function provides the ability to define groups under different formation criteria such as by Member, Team, Discipline / Trade, and Company. SPS|PM does this by enabling you to create custom groups comprised of multiple teams, team members, Disciplines / Trades, and companies. Once a group is created based on a given criteria, SPS|PM data can be visualized for that group.
To create, edit or remove a Custom Group in SPS|PM, complete the steps below:
Create Custom Group
To create a new Custom group in SPS|PM, complete the steps below:
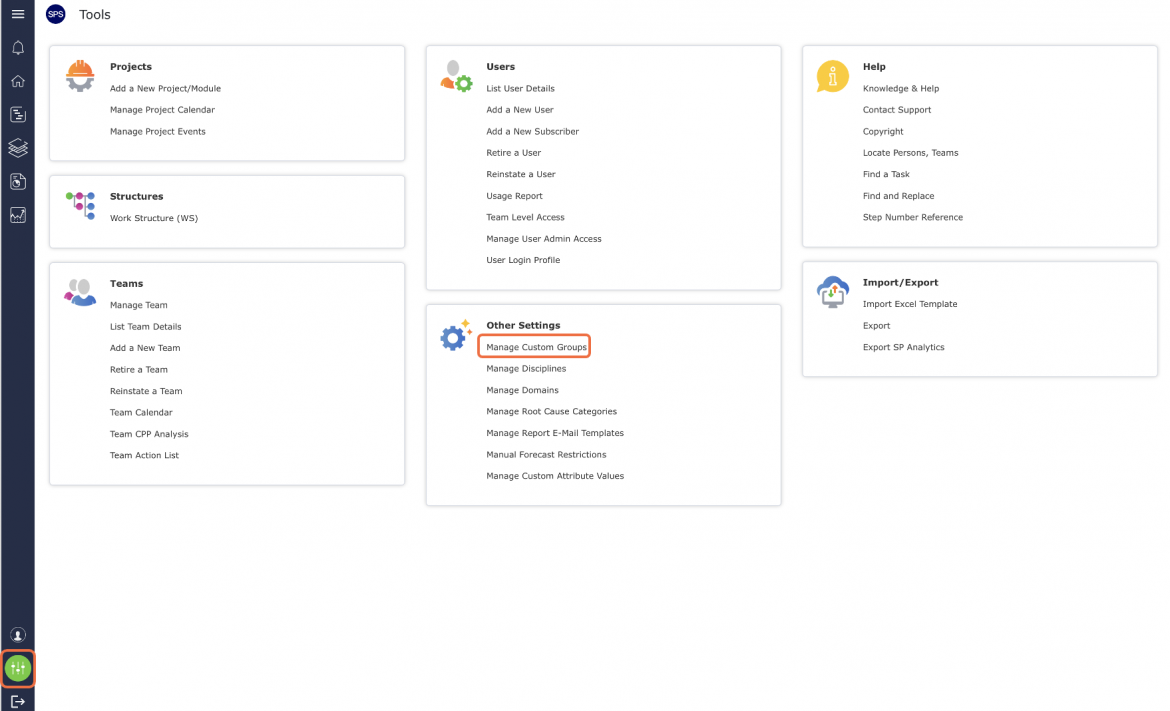
- From the Main Navigation Bar select Tools, then select Manage Custom Groups.
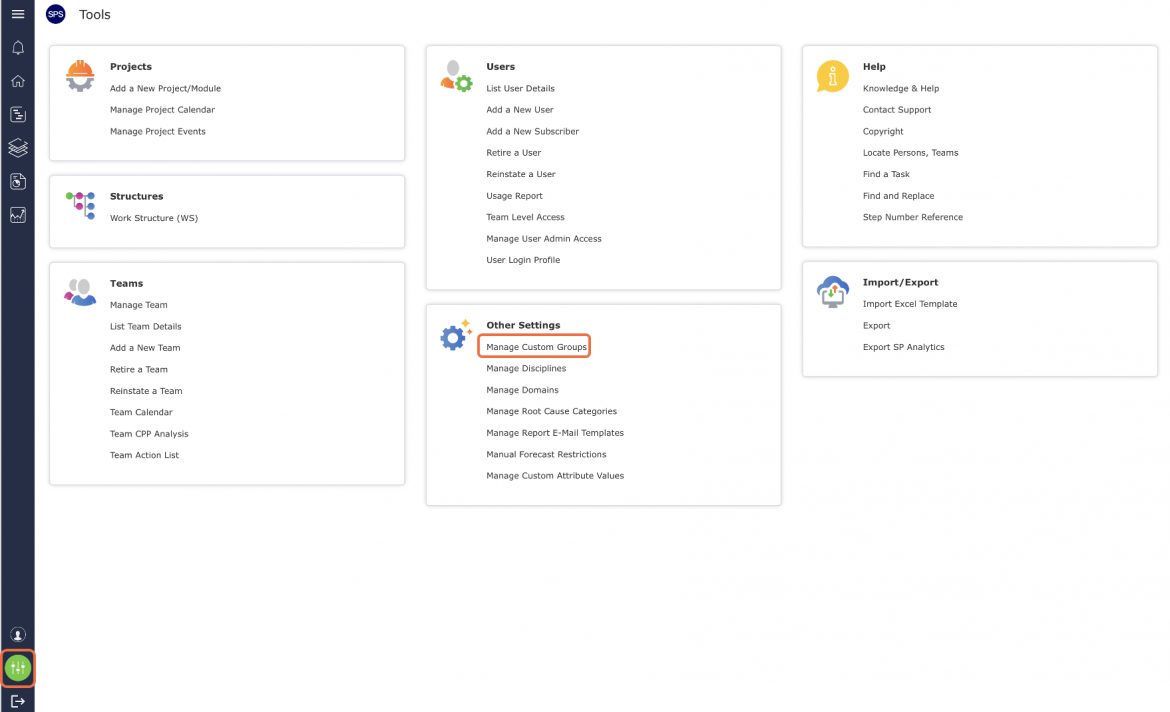
- The Manage Custom Group window opens and displays a drop-down to select or create a Custom Group.

- To create a new Custom Group, select Add New from the Select a Custom Group drop-down.

- A table allowing you to specify the Group Name and Group Type will display.
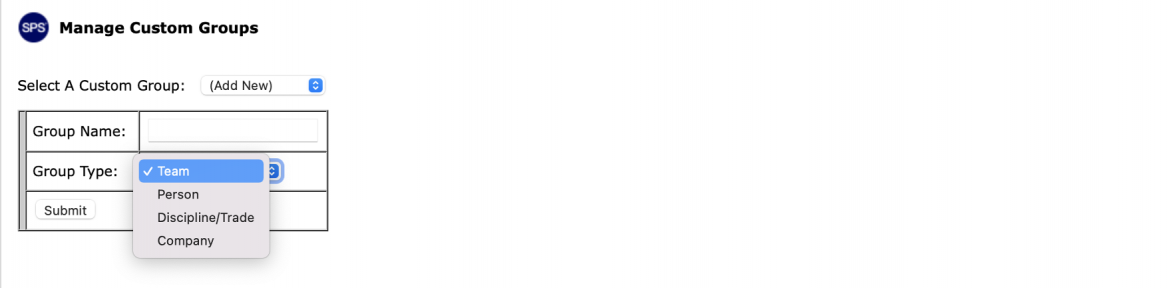
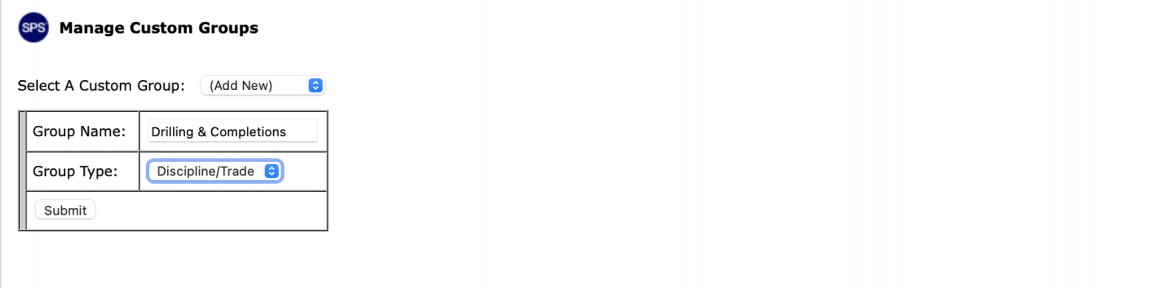
- Enter the desired name of the new Custom Group, select the Group Type (Team, Person, Discipline / Trade, Company), and then click the Submit button.
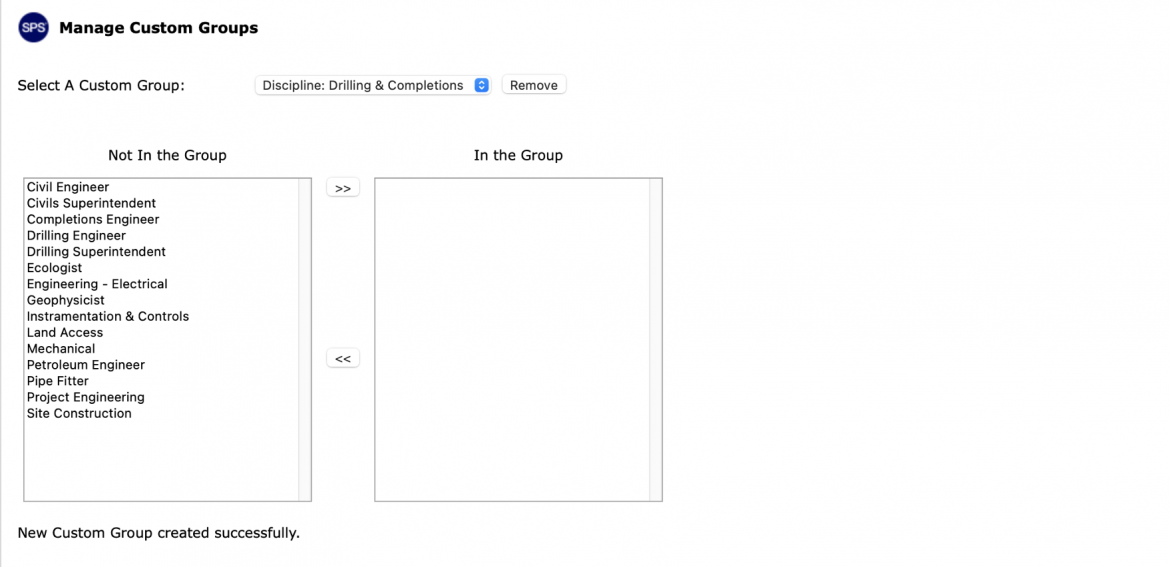
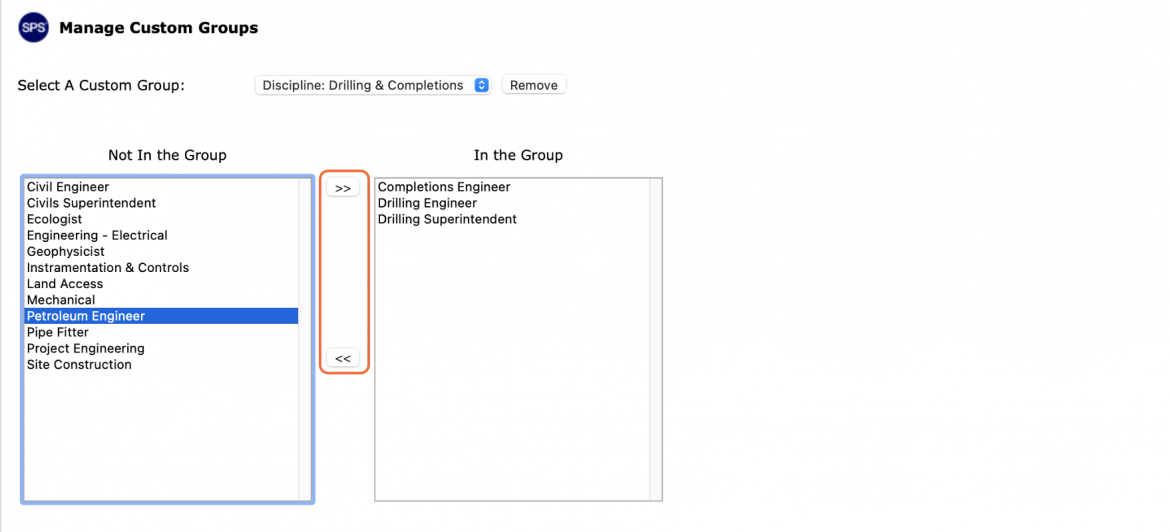
- The Manage Custom Group window refreshes and displays a confirmation message at the bottom of the window and two tables. The left table (Not in the Group) contains the selected Group Type values that have not yet been added to the Custom Group and the right table (In the Group), contains the values added to the Custom Group.
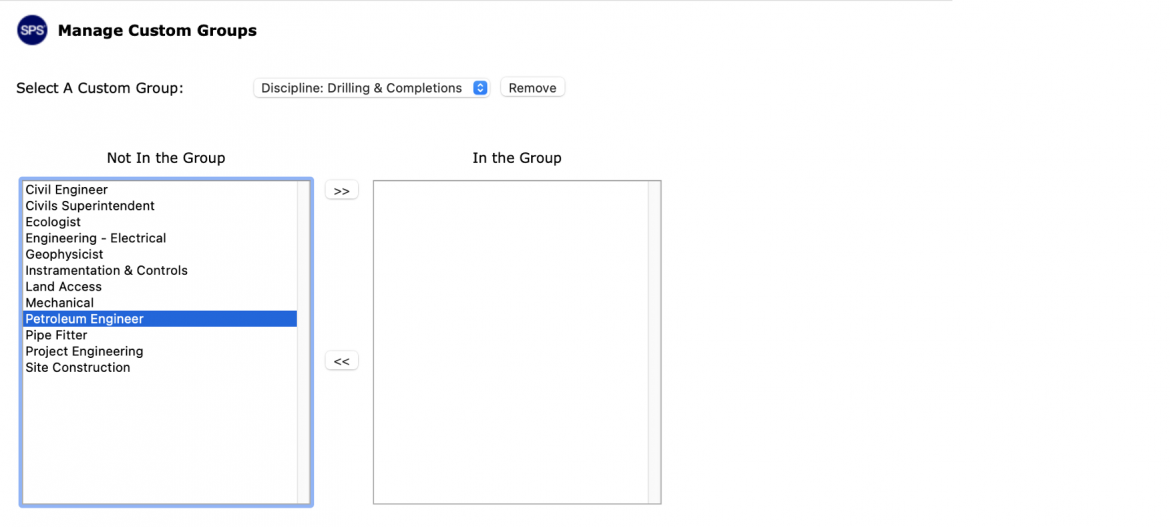
- Select the desired Group Type values from the Not in the Group table by clicking on them once. Once selected, the value will display a blue background.
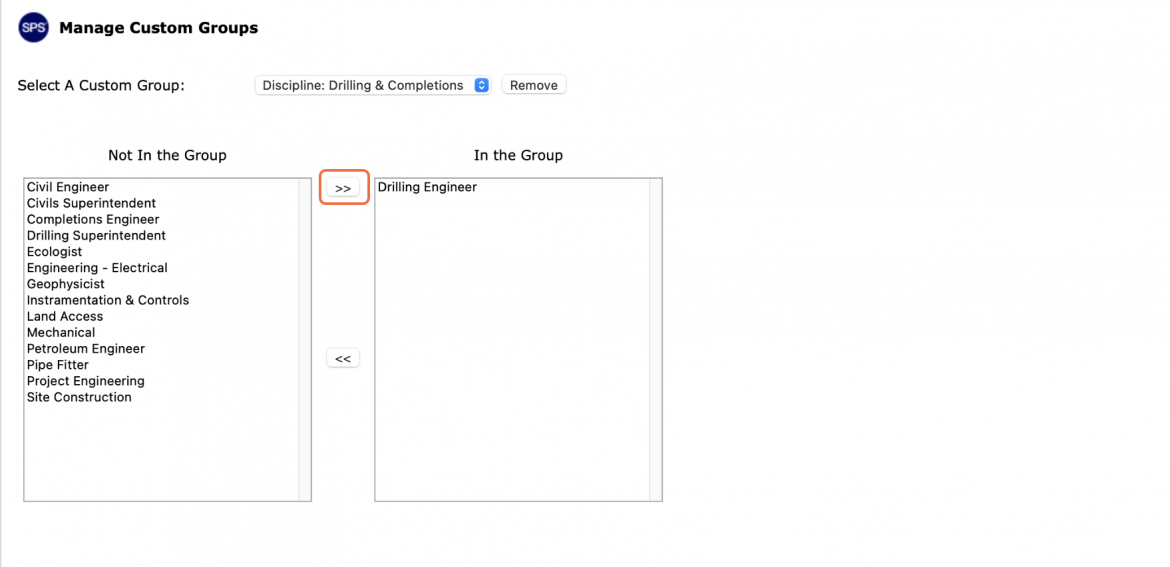
- Click the button with the right-pointing arrows to add the selected value from the Not in the Group table into the In the Group table. The selected value is removed from the Not in the Group table to the In the Group table.
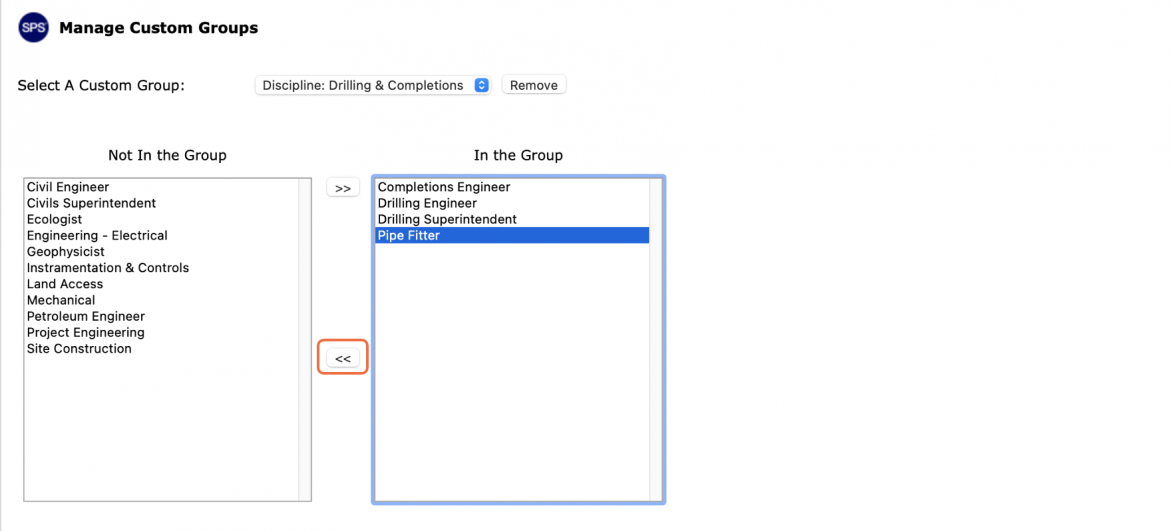
- To remove a value-added in error, select the desired value from the In the Group table by clicking on it once. Once selected, the value will display a blue background. Then click the button with the left-pointing arrows to remove the selected value from the In the Group table into the Not in the Group table.
- Repeat the above step to add all desired values to the new Group.
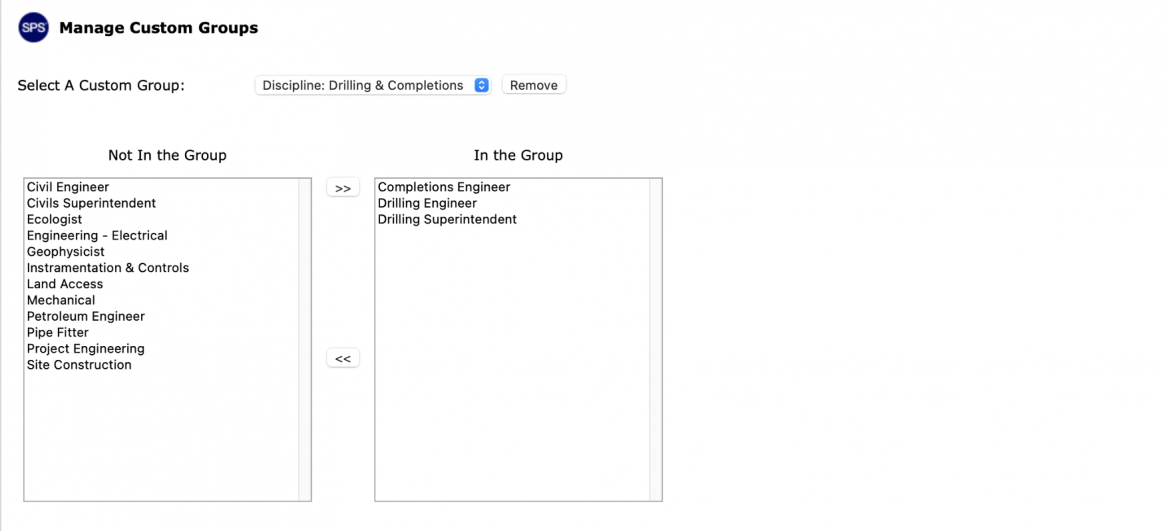
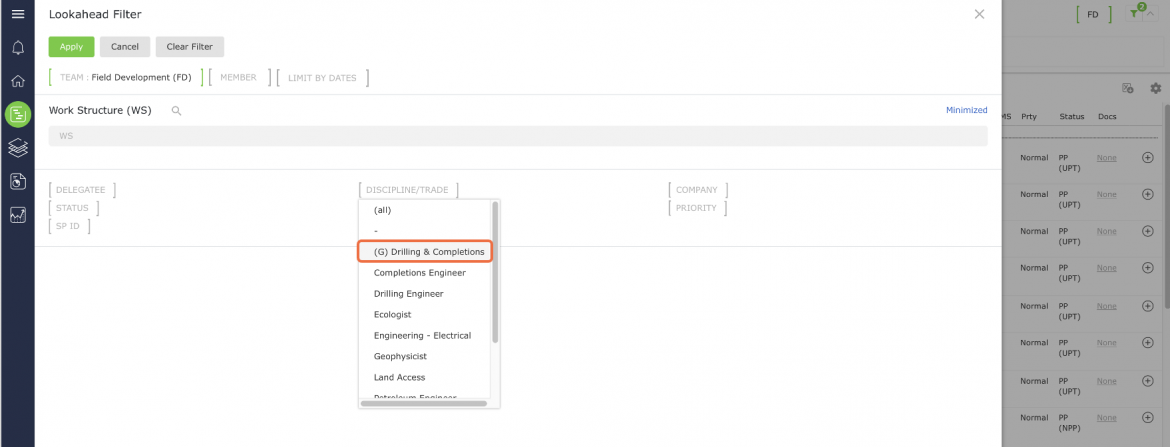
- The new Custom Group will display in the attribute filters such as in the Lookahead view. All Custom Groups are designated with a (G) preceding the Custom Group name.
Edit Custom Group
To edit an existing Custom group in SPS|PM, complete the steps below:
- From the Main Navigation Bar select Tools, then select Manage Custom Groups.
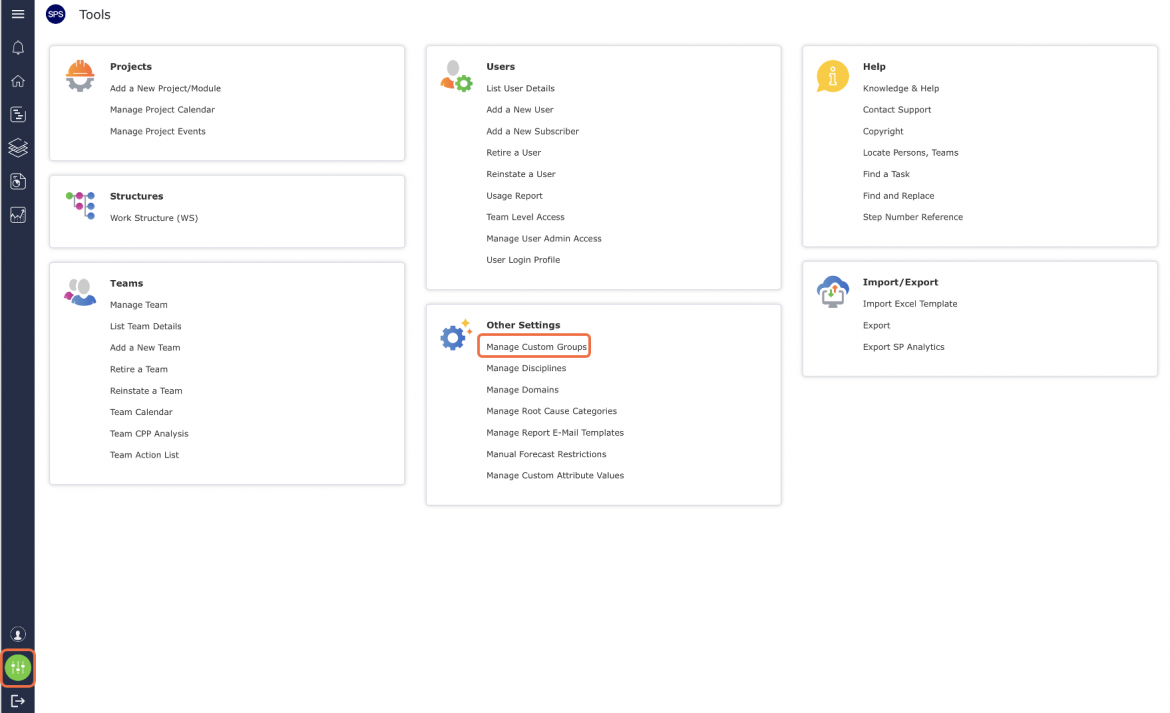
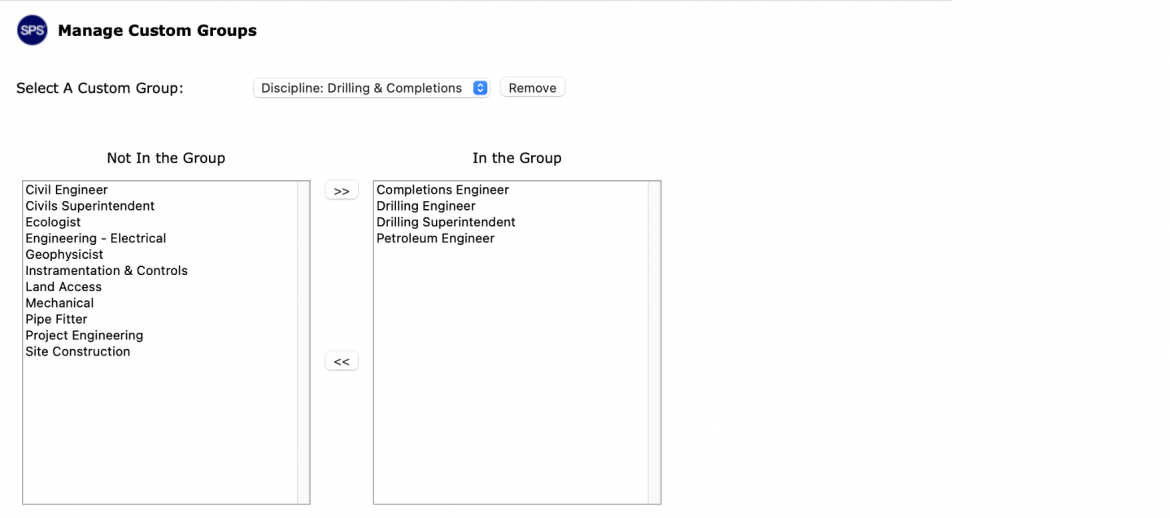
- The Manage Custom Group window opens.

- Select the desired Custom Group from the Select a Custom Group drop-down.

- The Manage Custom Group window will refresh and display the Category Type values within the In the Group table to the right.
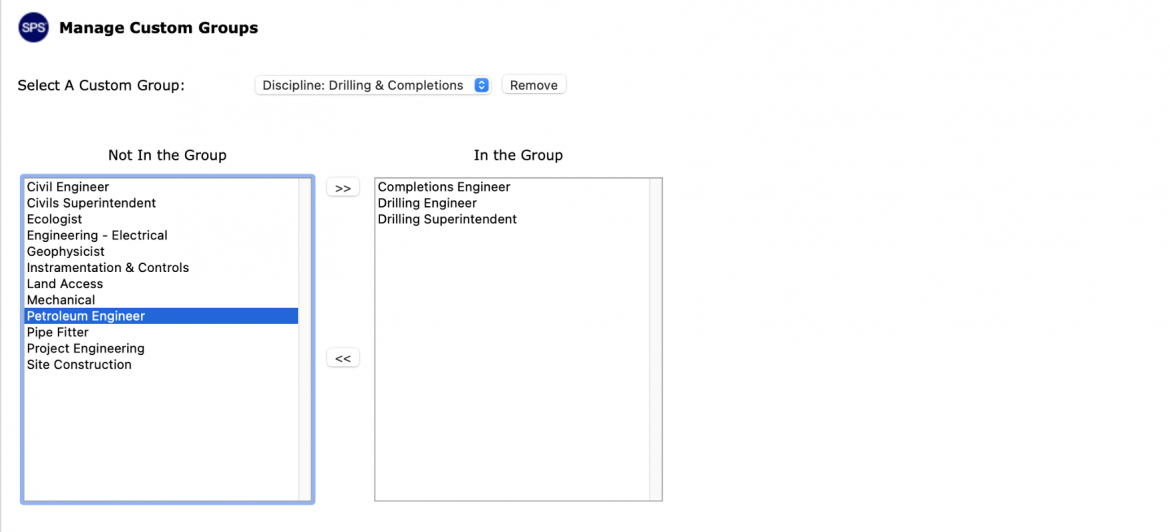
- To edit the Custom Group, select the desired value from the In the Group table or Not in the Group table by clicking on it once. Once selected, the value will display a blue background. Then click the button with the right or left-pointing arrows to add / remove the selected value between the two tables.
Remove Custom Group
To remove an existing Custom group in SPS|PM, complete the steps below:
- From the Main Navigation Bar select Tools, then select Manage Custom Groups.
- The Manage Custom Group window opens.

- Select the desired Custom Group from the Select a Custom Group drop-down.

- The Manage Custom Group window will refresh and display the Category Type values within the In the Group table to the right.
- Click the Remove button to delete the Custom Group, then in the confirmation pop-up, click the OK button.
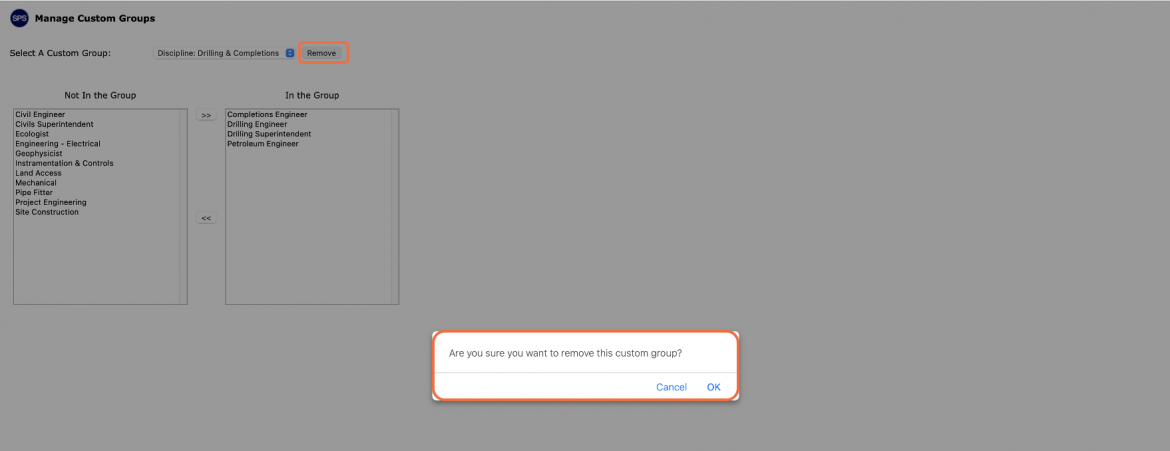
- The Manage Custom Group window will refresh.

- The removed Custom Group will no longer display in the attribute filters such as in the Lookahead view.