
Within an established working calendar (e.g., 8 hours per day, 5 days per week), Team Calendar enables the definition of partial working days and non-working days, differentiating those from full working days.
To edit the working calendar for a team, complete the steps below:
From the Main Navigation Bar select Tools, then select Team Calendar.
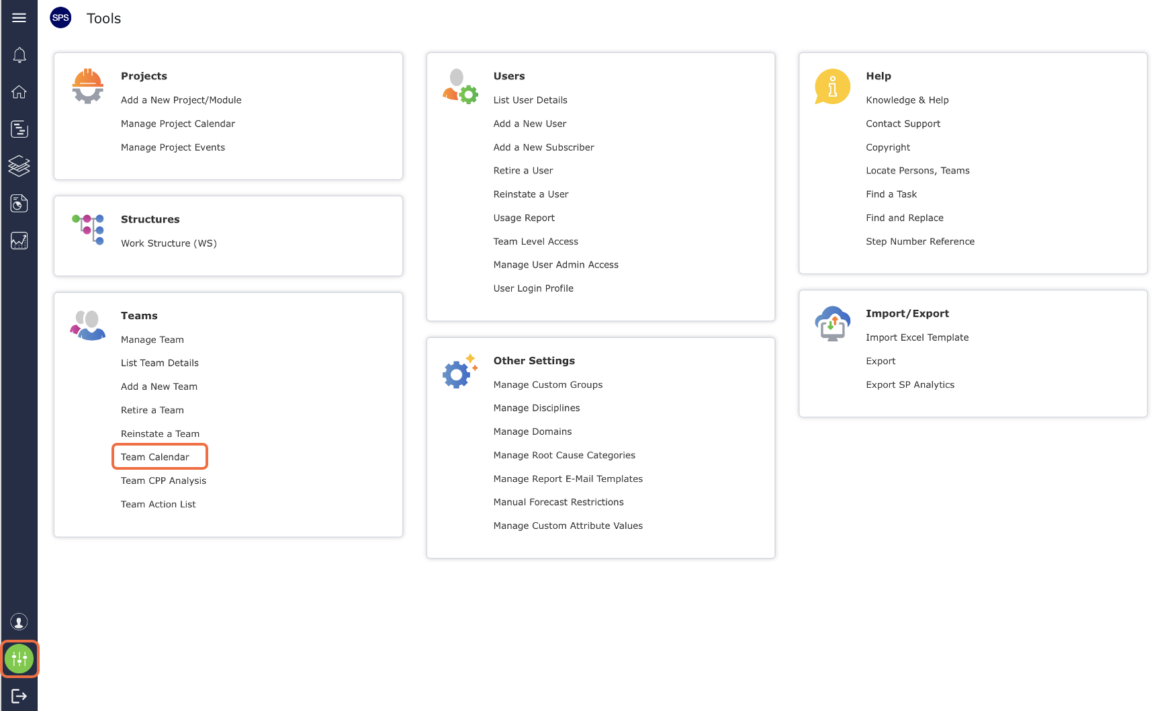
Note: This menu item is always present regardless of whether or not you are operating with Team-Level Access. All individuals can view the team calendar for any team within SPS|PM, but Team-Level Access is required to change any of the information.
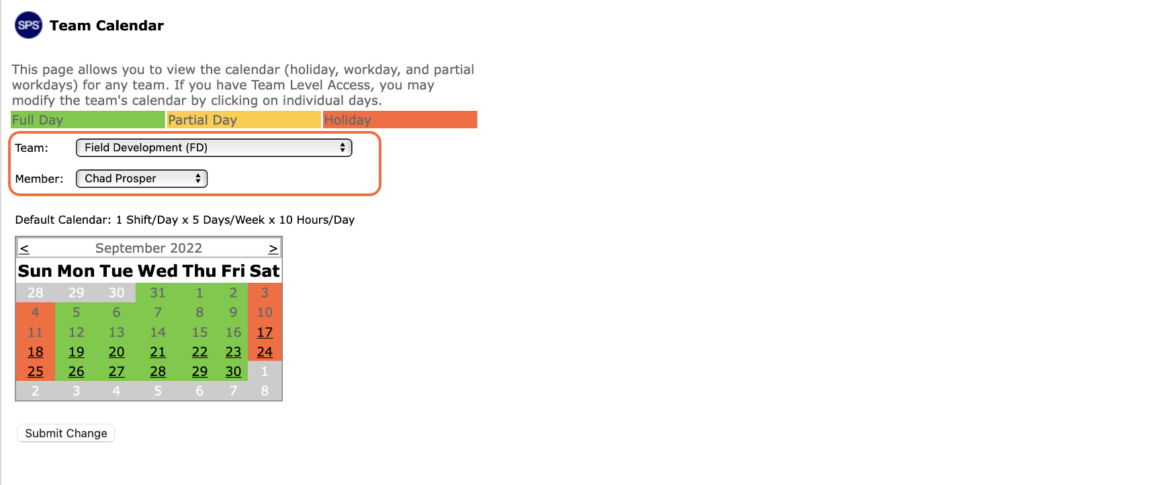
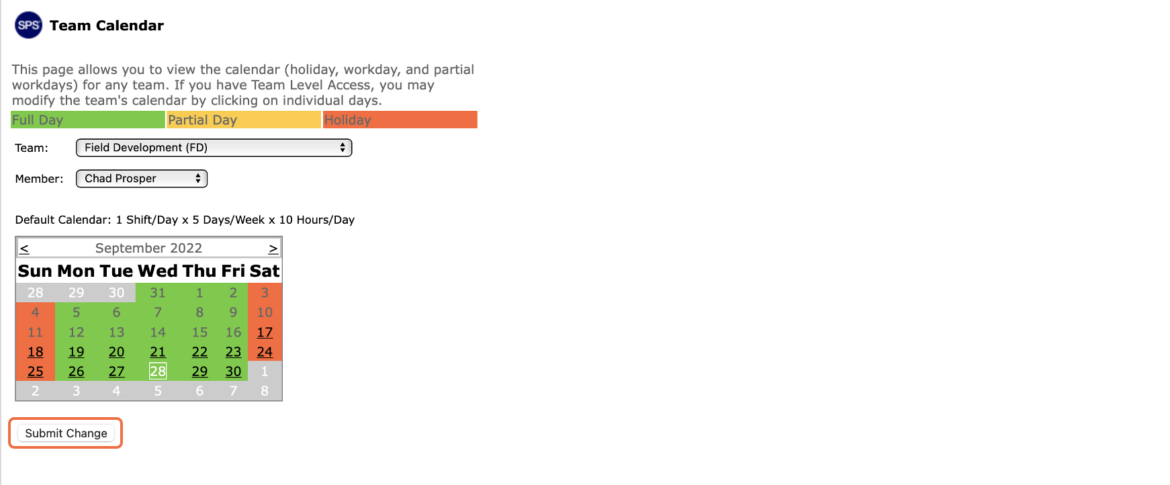
The Team Calendar window opens as shown in the image below.
As indicated in the legend above the calendar month, full working days are shaded green, partial working days are shaded yellow, holidays (i.e., non-working days) are shaded red-orange, and days prior to, and after the selected month, are shaded gray.
Select the desired team name and an associated team member from the Team and Member drop-downs, then click on the date in the calendar month you desire to edit. If you wish to edit the calendar for an entire team and not only for one team member, select (All) in the Member drop-down.
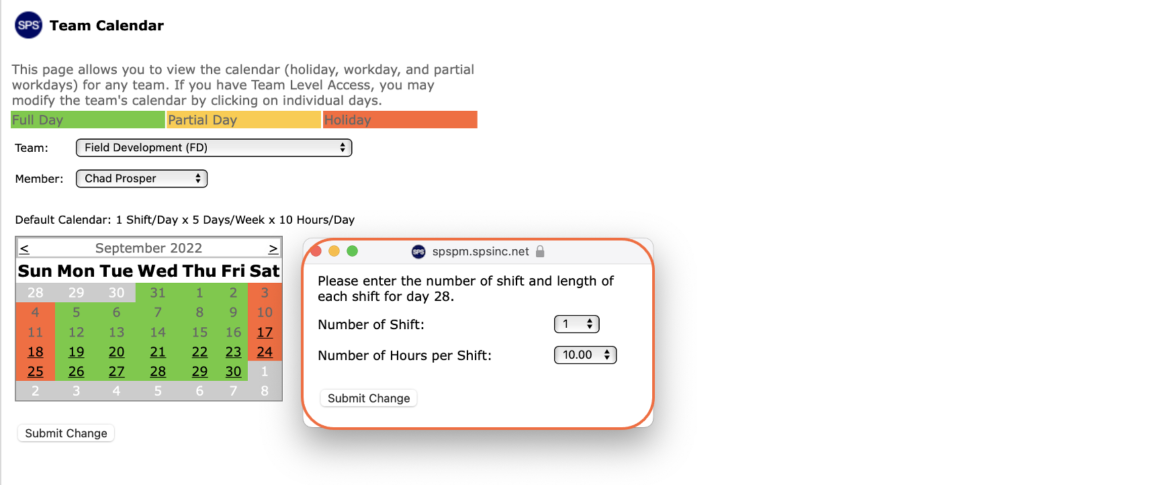
A pop-up will open as shown in the image below. Select the number of desired shifts and number of hours associated with the shift(s) from the Number of Shift and Number of Hours per Shift drop-downs, then click the Submit Change button in the pop-up. Do not click the Submit Changes button in the Team Calendar window.
Note: To enter a holiday i.e., a non-working day, select 0 (zero) for the Number of Shift and 0 (zero) for the Number of Hours per Shift.
If the changes are successfully applied to the date, the text on the selected calendar date will change from black to white as shown in the image below.
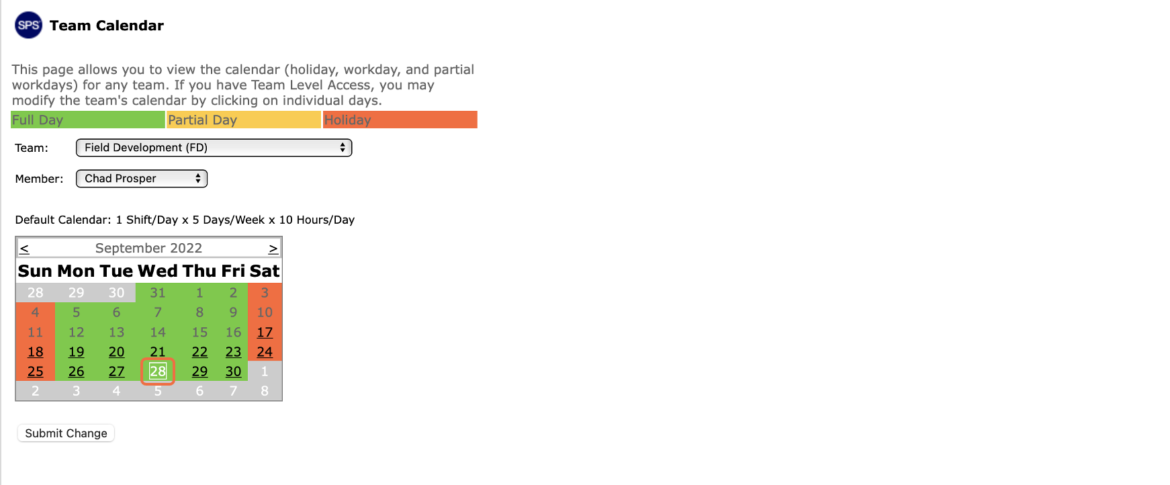
If the change is accurate, to commit and complete the change to the calendar, click the Submit Change button as shown in the image below. The background color for that day will change accordingly.
If the change is not accurate, before clicking the Submit Change button, repeat the above steps to reflect the desired changes, then click the Submit Change button.
Note: You can change multiple dates in a single month before clicking the Submit Change button to commit multiple changes at one time.
- When a change is made to the team calendar, all the dates for existing tasks will be accordingly recalculated. If there are any conflicts, (for example, if a milestone or manually-set forecast date is a non-working day) a pop-up will appear, as shown in the image below, informing you of the conflict.
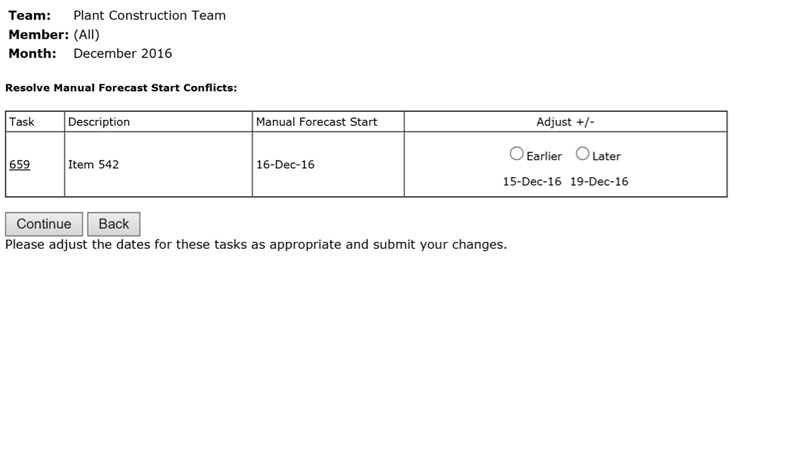
To proceed with the calendar change, resolve the conflict by selecting the Earlier or Later radio button under the Adjust + / – column for all conflicts, then click the Continue button or click the Back button to return to the calendar month.